Showing posts with label no shampoo. Show all posts

Saturday, June 6, 2015

5 Uses for Leftover Whey


I love Greek yogurt! In fact, I wrote a detailed blog post all about how to make your own (click here to read Homemade Yogurt). If you've ever made homemade Greek yogurt, then you know whey is a byproduct of the straining process, and you can end up with quite a bit of it.

What should you do with it? Throwing it away is such a waste, considering there are so many ways to use it!


1) Marinate Meat in Whey

I haven't personally tried this one yet, but (from what I've read), the enzymes in whey help to tenderize the meat. I couldn't find any reputable sources however, only other blog posts. It makes sense to me, since whey is slightly acidic. Whey has a pH of "less than or equal to 5.1" (Source: Handbook of Dairy Foods and Nutrition); that is around the same acidity of apple cider vinegar, which is "4.25 to 5.0" (Source: Testing the Acidity of Vinegar).

Here is an interesting recipe for a whey marinade that I plan on trying soon: Whey Moroccan Chicken Marinade.

2) Boil Pasta and Rice in Whey

This one I have tried! I've read that it alters the flavor a bit, but I haven't noticed yet. Neither has anybody I've cooked noodles or rice for. The only difference I've noticed is that the pasta is a bit more tender.

3) Rinse Your Hair with Whey

This is probably my favorite one! Whenever I do this, it leaves my hair silky, shiny, and softer than ever. Even before I gave up commercial shampoo (check out Going No Poo if you're curious about that), I rinsed with whey a few times. Whenever I did, I didn't need to wash my hair for up to a few days. Of course now I don't wash my hair at all, but I still love a good whey rinse! Just be sure not to get it in your eyes or mouth while rinsing.

4) Use Whey as a Substitute for Buttermilk

I've successfully used whey in a cornbread recipe that called for buttermilk, and even for buttermilk pancakes! I love that I don't have to go out and buy buttermilk just for a few recipes; I can use the whey since I have it on hand. I seriously recommend making French toast with whey (beat some whey into the eggs you'll be dipping the bread into). It makes the French toast slightly sweeter in my opinion.

5) Mix Whey into Your Coffee 

I always mix a few tablespoons of whey into my iced lattes. It adds another depth of flavor as well as some helpful vitamins and probiotics. Adding it to hot coffee might kill the probiotics, but it will still have a yummy flavor!


Do you have any uses for whey that I haven't mentioned? If so, comment below!

Tuesday, May 26, 2015

Going No Poo: 6 Months (Water Only)


In just six short months (okay, they weren't that short), I've finally reached hair nirvana! In Going No Poo: 5 Months, I talked about attempting water only (WO) washes unsuccessfully. Well, I finally figured out the trick: I've been using water from our water filter to combat the hard water!

It struck me one day as I was getting myself a drink of water: we use a water filter on our tap to remove chlorine, fluoride, and other unwanted minerals that affect taste. So why not use it on my hair?

Edit: I recently found out that our Pur water filter doesn't remove fluoride. Bummer!


Well, it worked! I've been very happy with the results over the last month.


How Exactly Do I Do It?

These WO washes were extremely easy! I simply take one of my son's plastic cups, fill it with filtered water from the tap, and take it into the bathroom with me. Next, I lean over the side of the tub and slowly pour the filtered water on my head, making sure to get all of the hair wet. After that, I massage my scalp and run my fingers through the length of my hair. If I'm getting a shower, I turn on the water and get in; otherwise I go about getting ready. I prefer to let my hair air dry or blow dry it on low heat followed by a blast of cool air.


Benefits to WO:


  • I don't need to spend any money on my hair, other than the cost of the filter and the water.
  • I can go WAY longer in between WO washes. Alternatively, there is no harm in using water everyday if I'd like.  


The highlight of my month was when a friend in my leasing office asked if I was still doing the whole No Poo thing, because she couldn't even tell!

I like to think there is a moral to this story: giving up shampoo is not for the faint of heart. However, if this is something you're considering for any number of reasons (maybe you have scalp problems like I did, or maybe you're worried about the nasty chemicals in commercial shampoos), and you aren't too intimidated by the transition process, then I say go for it!

I managed Going No Poo with things that I had on hand and easily accessible ingredients that you can find in any grocery store. Every scalp and head of hair is unique, though, so everybody's journey won't be the same as mine.


I'm a bit sad to say this will be the last post in the Going No Poo series, but I like to think that I'm leaving it off on a happy note. Even though I won't be writing this monthly series anymore, I will certainly update y'all with a new post if there are any surprises in my journey. I wish anybody who begins this journey for themselves the best of luck!

To read more of the Going No Poo series, click here:

Thursday, April 23, 2015

Going No Poo: 5 Months (Deep Conditioning Mask & Egg Yolk Wash)


I can't believe it's been 5 months since I took the leap into No Poo, and gave up shampoo! I honestly cannot imagine ever using shampoo again!

I gave WO (water only) washes a try these last few weeks, pretty much out of sheer laziness. In my ideal world, I wouldn't need to do anything to my hair other than wet it. Well, it didn't work out so well. I have hard water, and after a while those minerals left my hair feeling stiff and dry. I could tell that my limp and lifeless hair needed some moisture, so I tried a deep conditioning honey/coconut oil mask. I followed my oil treatment with an egg yolk and honey wash to make sure my hair wasn't left feeling greasy. The results were fabulous!

Definitely one of my Top 3 best hair days
since Going No Poo!


Honey & Coconut Oil Deep Conditioning Mask


  • 2 Tablespoon Raw Honey
  • 1 Tablespoon  Coconut Oil
  • 1 Teaspoon Filtered Water

Mix together all three ingredients in a container with a lid (a mason jar or a condiment dispenser, for example). Apply the lid (plugging the opening, if using a condiment dispenser) and shake, shake, shake! The goal is to combine the ingredients as best you can.

Apply the mixture to moistened hair (not dripping wet), making sure to massage into the scalp and pull it through the length of the hair. You'll definitely need something to contain this sticky, oily mess, like a shower cap. I just use an old long-sleeve shirt to wrap up my hair; the long sleeves wrap around my head nicely, and keep it in place. Leave the deep conditioning mask on for at least 30 minutes, or even longer if you like. I usually leave mine in for a few hours.

When you're ready to remove the deep conditioning mask, you'll need something more than water or diluted ACV (apple cider vinegar) to get the coconut oil out. If you use regular shampoo, you can remove the oil with that. However, if you've given up commercial shampoo already, an egg wash works wonders at removing oil! Read on for the egg yolk/honey wash recipe.


Egg Yolk & Honey "Shampoo"


  • 2 Egg Yolks
  • 1 Tablespoon Raw Honey

Mix the egg yolks and honey together thoroughly (use an immersion blender to quicken the job).

Rinse the honey/coconut oil mask from your hair as best you can. Apply the egg yolk/honey mixture to your hair, massaging into the scalp and pulling it through the length of the hair. You may need to double the recipe if you have long hair. Leave the wash in while you finish up your shower routine, or for about 5 minutes, and rinse it thoroughly with lukewarm water (you don't want to cook the egg yolks).

You may follow with a diluted ACV rinse if you wish, but it is not necessary.


Beware:

You can do this deep conditioning treatment without a wash, but be prepared to walk around with oily hair for a day or two. I just recently tried skipping the wash, and it was pretty oily the first day, but my hair eventually absorbed it.

Try not to wash with egg yolks more than once a week, and no more than once a month for the whole egg. They contain a lot of protein, and too much protein can lead to dry, brittle hair that breaks easily. If you suspect protein overload in your hair, moisturizing is the only option.


Bye-Bye BBB

In the last month, I've given up the BBB (boar bristle brush), for the most part. I just can stand how often it needs to be cleaned, and how rough it is on my hair. I just purchased a cheap wooden comb off of eBay (seriously, it was only 80 cents), and so far it's working well. It moves sebum a bit better than a regular old plastic comb, without damaging my hair like the BBB did.


To read about the rest of my journey, click here:

Tuesday, March 3, 2015

Going No Poo - 4 Months


So I've been a bit behind on my blog posts again. I'm not going to beat myself up about it though, because I managed to stay on top of my schoolwork, declutter a ton of stuff, and even start a new hobby (brewing kombucha)!


No Poo Haircut


I finally got another haircut, making it my second one since going no poo. I had the same stylist, and she was still super supportive of my crunchy antics. I was definitely due for one though. You can see in the picture above, it was getting a bit wild.


Experiment, Experiment, Experiment!

One thing I've learned throughout this journey is to experiment! I seriously cannot say it enough. After being acid only (AO) for the last 3 months, I decided to switch it up a bit. I felt like my hair was getting weighed down again (similar to what I was experiencing before switching from honey to AO). I swear my hair just does not want to settle into a routine.

I knew I wanted to try some sort of sebum removing wash, because I suspected my hair was heavy due to buildup (most likely from sebum). It also needed to be something I had on hand, because I refuse to order something special unless I absolutely must. It came down to baking soda and egg. Egg seemed like the gentler and easier option, so I went with that.


Egg Wash


For my egg wash, I simply beat a whole egg with an 1/8 teaspoon of coconut oil. I applied it in the shower, left it on for the rest of my shower routine (about 5 minutes), rinsed with cold water (hot water will cook the egg, and it will be hard to get out), and finally a diluted apple cider vinegar (ACV) rinse. The egg wash is the most sebum removing wash I've done since switching from commercial shampoo, so in hindsight a teaspoon of coconut oil probably would've been better. I only left the egg in for five minutes to avoid any smell issues; I also rinsed with ACV for the same reason.

You can see the difference the egg wash made in the picture above. Look at that lift and body! I sort of wish I'd done the egg wash before my haircut, but oh well. In my first ever post about giving up shampoo, Going No Poo - Week 1, I mentioned egg washes as one alternative to shampoo. While egg is great at cleansing and removing sebum, it can lead to protein overload if used more than once a month (the white or the yolk can be used weekly though). I'll probably try doing my egg wash bimonthly and see if I need to increase frequency from there. If I can push it even farther, that's even better!


What's Next?

Since I've been brewing my own kombucha, I plan on trying a kombucha rinse soon! I'll write about it next month and let y'all know how it worked.


To read about the rest of my journey, click here:

Tuesday, February 3, 2015

Going No Poo - Week 12 (& Herbal Hibiscus Rinse)


In the spirit of minimalism, I've decided to minimize my stress and workload by making the Going No Poo series a monthly post rather than a weekly one. To be honest my scalp is so normalized that there isn't really anything new going on.

One of my main goals when starting this blog was to help others feel beautiful naturally, without having to conform to societies mainstream notion of what beauty is. I can honestly say that after three months without commercial shampoo, my perspective on hair has changed quite a bit. For example, my hair looked somewhat oily yesterday, and rather than think it was "gross," I thought: "my hair is softer than the the softest puppy I've ever felt!" Yes, that was my exact thought. I hope this blog inspires even one other person to feel the same way, rather than worry about what everybody else will think.

My monthly No Poo progress.
Check out those natural waves happening!

One thing that I have noticed is that my hair does not like to settle into a routine. As soon as I find something that works wonderfully, my hair decides it's time to switch it up. For the last few weeks, I've been alternating between an apple cider vinegar rinse and a coffee/herbal tea rinse. I've finally gotten my tea rinse to the perfect ratios (for me), so here it is:

Herbal Hibiscus Rinse


For my herbal tea rinse, I simply mix all of the ingredients together and pour it over my head. Applying this rinse over the sink (onto dry hair*) is the easiest method for me. I put a large mixing bowl in the sink to catch most of what I pour over my head, that way a little rinse goes a long way.

I also add a drizzle of honey occasionally (about a teaspoon), particularly if any irritation pops up (like during the winter months).

*I apply the mixture to dry hair, rather than wet, because of hard water issues. 

For the Hibiscus Tea:

I boiled 2 hibiscus tea bags in 1 cup of water for 5 minutes, and then let it steep for about 30 more minutes. Mine reduced to a 1/2 cup by the time all the boiling/steeping was done, but you can save the leftovers in the fridge if you wind up with more than half a cup.

For the Rosemary/Ginger Tea:

I boiled a fresh piece of ginger (about an inch long), 2 tablespoons of dried rosemary, and a teaspoon of ground turmeric in about 2 cups of water for 5 minutes, and then let it steep for 30 minutes. Since this herbal tea has loose herbs, it's best to strain with a coffee filter before using. As with the hibiscus tea, you can store the leftovers in the fridge.

Strongly brewed coffee can be used in place of espresso. 


Behold my healthy scalp, free of irritation and/or dandruff!


To read about the rest of my journey, click here:

Sunday, January 18, 2015

Double-Duty Orange-Infused Vinegar: Hair Rinse & Household Cleaner!


This post was originally inspired by a Facebook post (click here to see it).

I've mentioned before that I love double-duty DIY products! Reusing tea bags and leftover coffee for conditioning hair rinses, and old coffee grounds as a facial scrub are just some examples. Well, I was peeling a mandarin orange for my son one day and I thought, "These smell too delicious to just throw down the garbage disposal!" (Although, that is one way to repurpose orange peels and freshen up your disposal. Can you say "double-duty?") I then remembered that my mom had shared a post to my Facebook page about soaking orange peels in vinegar for 2 weeks to create your own orange-infused vinegar! I had everything I needed, so I went ahead and tried it.

Basic Concept:

The instructions for this project were quite simple: fill a jar with orange peels, cover the orange peels with vinegar, and let them soak for 2 weeks.

I actually made two different batches. I decided to add rosemary and a cinnamon stick to one jar, because of their benefits to hair. A week later, and one sniff, let me know that the cinnamon/rosemary one will only be for cleaning! The cinnamon smell was so strong I wouldn't even dream of trying it on my scalp. Some folks actually experience a burning sensation with cinnamon, so I didn't want to risk it - especially considering how strongly it smelled. Thankfully, I had made one normal batch that could still be used for my hair.


Straining the Vinegar:

Strain the vinegar before using it (trust me, the rosemary and orange peels will clog your spray bottle). Simply place a strainer over a bowl or measuring glass, and pour the orange-infused vinegar into the strainer. You may need a fork to get all of the orange pieces out. I suggest letting them sit for awhile so that the excess vinegar can drip down.

I only took pictures while straining the vinegar with the orange peels.


The final product is orange-colored.
Save the orange peels and use them again!


For Cleaning:

If you're using your orange-infused vinegar for cleaning, like the rosemary/cinnamon one I created, then you only need to dilute it to  50% with water. Mine smelled incredibly strong because I used a whole stick of cinnamon (too much, by the way), so my ratio was more like 3 parts water to 1 part vinegar. I seriously recommend using a very small amount of cinnamon or just leaving it out all together.  Nobody in my household was a big fan. However, it was pretty great at removing hard water stains.

Add it to a spray bottle or squirt bottle to make cleaning easier.


For Hair:

If you've read any of my Going No Poo post, you might know that I'm a big fan of using apple cider vinegar as a conditioner. This orange-infused vinegar (you can use white vinegar or ACV) can also be used on hair! Dilute it to your preferred vinegar rinse solution. If you're a first-timer, you should start with 1 or 2 tablespoons of the orange-infused vinegar per 1 cup of water. The orange peels are great at removing excess oil, so you definitely don't want to overdo and remove too much of your natural sebum.


After You're Done:

Don't toss those orange peels yet! You can use the same orange peels and repeat the process all over again! I've only reused them once so far, but I'll definitely try it again after the second batch is done.


My Experience:

I absolutely loved the orange-infused vinegar! The orange, rosemary, and cinnamon one... not so much. It came in handy when the newest fur baby in our house had an accident on the carpet though - it definitely covered up the urine smell. Adding the cinnamon was a fail, in my opinion, but there was no way I was going to let it go to waste.


Sunday, January 11, 2015

Going No Poo - Week 9 (& Honey/Coconut Oil Mask for Dry Scalp)


How is everybody fairing during these winter months? This back-and-fourth, Florida weather is driving me a bit crazy. I know I should't complain, because some people are in the teens and twenties! It just bothers me that Florida can't make up it's mind. Seriously, how can it be 90 degrees one day and 60 degrees the next? Okay, I'm done complaining...

With the winter months comes dry scalp for a lot of people. It even got me this winter, here in Florida! I did another Moisturizing Honey Mask to soothe my dry, irritated scalp, but this one was just a bit different from my last one.

For this mask I used only 3 ingredients: honey, water, and coconut oil.


Honey/Coconut Oil Mask for Dry Scalp


  • 2 Tbsp Raw Honey
  • 1 Tbsp Water
  • 1/8 tsp Coconut Oil

Directions


  1. Mix all the ingredients together. 
  2. Apply the mask to the scalp, and work through to the ends of the hair. You may need to double the recipe if you have long hair. Using a squirt bottle (like a hair dye applicator) makes the process a lot easier, as does standing over the sink. 
  3. Wrap hair with an old, clean T-shirt or a shower cap, and leave the mask on for at least 30 minutes. The longer you leave it on, the better it soothes and heals scalp irritation. 
  4. Rinse with water. You can follow up with an apple cider vinegar (ACV) rinse if you'd like, but it's completely optional.


Success! This Mask did exactly what it was meant to do: soothed and
healed my scalp irritation without leaving my hair oily.


What else is new this week?

I finally got around to trying a hibiscus tea rinse! You may remember me mentioning hibiscus tea in my post about Herbal Tea Rinses. In case you don't, it is great for auburn/red hair and for bringing out natural red tones. I don't really have auburn hair anymore, but part of me hopped for reddish tones after using it. There haven't been any noticeable changes after 2 applications, although it does smell great! I'm still using my espresso rinses as well - in fact, I even mixed it with the hibiscus tea to produce a darker red.


Good "hair days" are a lot more common these days than they used to be. Even my bad hair days aren't really that bad. For comparison, I've posted a picture of the best hair day I've had this week along with a picture of the worst. Even at my worst, I didn't feel gross or greasy. I even went out with a friend... in public! *gasp*


To read about the rest of my journey, click here:

Sunday, January 4, 2015

Going No Poo - Week 8 (Children & No Poo)


It's been 2 months since I've used commercial shampoo! I love to bring it up in conversation, and watch the expression on people's faces go from disgust to curiosity, and then to amazement at the fact that my hair looks, feels, and smells clean (yes, I do encourage touching and smelling).

I'm still using an espresso rinse, usually with some whey and rosemary/ginger herbal tea mixed in. I sometimes add a drizzle of honey as well. Right now I'm rinsing every other day. I may try experimenting with some other rinses soon, but for now I'm happy with my current routine!


Children & No Poo

My 5 year old son has been No Poo for about as long as I have, give or take a week. He's pretty much water only (WO), with an occasional apple juice rinse. That's the only thing he'll let me put on his head other than water, but he's come to love it - and even request it! It might have something to do with me allowing him to squirt the leftovers in his mouth and drink it after...


Look at his beautiful, shiny hair and healthy scalp!

If you're a parent already, you may know that washing a child's hair everyday is completely unnecessary, and can actually dry their scalp out. Before making the switch to No Poo myself, I was only washing my 5 year old's hair about once a week. After I stopped using all those yucky, chemical-laden shampoos on my hair, how could I go and slather it on his head? That's when we decided to ditch the 'poo for him as well! 

He has short hair and he doesn't sweat very much yet, so WO was the route we went with him. His short hair and healthy scalp made the switch a breeze; he didn't even go through any transition! 

I'd never force him to put anything on his hair that he didn't want to, so I started making suggestions about possible rinses we could use on him. Apple juice came up and he liked the sound of it! He really doesn't need the apple juice for his hair... it's more of a special treat for him. We dilute it to a ratio of 1 part apple juice to 1 part warm water (warm or room temperature water feels better going on than cold).


Why Apple Juice?

While raw apple juice is ideal, we simply used the processed stuff because it's all we had. Bonus points if you own a juicer and can extract the juice from your own apples!

  • Dandruff remedy - although my son doesn't have any dandruff problems, apple juice does contain malic acid and amylase, which help to exfoliate and remove dead skin and dandruff flakes (Source: hair buddha).
  • Soft, lustrous hair - much like apple cider vinegar (ACV), the acidity of apple juice helps remove product buildup and residue, helps distribute the sebum down the length of the hair shaft, and closes the cuticle (leaving hair shinier). 
  • Balances & maintains pH - the natural pH of the scalp is between 4.5 and 5.5 (which is acidic) and the pH of apple juice is between 3.3 and 4. Since the apple juice pH is so similar to our scalp (as opposed to commercial shampoos), it helps to maintain the natural acidic pH which hinders the growth of bacteria and fungus (Source: hair buddha & pH Values of Common Foods and Ingredients).


Benefits of No Poo

  • Softer hair - my son's hair is now unbelievably soft and silky. I honestly can't help myself sometimes... I love to touch and smell his hair.
  • Clear scalp - I didn't even realize that scalp irritation was a problem for my son until the switch. He'd never let me run my fingers through his hair before; he always said "ouchy," but I figured he just didn't want Mommy touching his hair. Since giving up shampoo, touching his scalp or hair isn't a problem. The first time he let me touch it without protesting I asked him if touching his head hurt anymore, and thankfully the answer was no. He loves his hair touched and scalp rubbed now!


Happy New Year from the No Poo Hippy Family!


To read about the rest of my journey, click here:
Going No Poo

Saturday, December 27, 2014

Going No Poo - Weeks 6 & 7


I've been pretty busy with the 7 Days of Christmas, so I was pretty late getting to Week 6. The week was already almost over by the time I got any free time, so I figured I'd just combine Weeks 6 & 7.


Giving Up Honey

I seriously LOVE honey. I love it! Have I said that enough yet? Despite my love-affair with honey, I actually haven't washed with it since Week 4 (well, maybe a drizzle in my rinses here and there). It doesn't mean that I don't love honey anymore (I swear, I do!), it was just time to switch things up! I felt like my hair was getting too weighted down, and I also felt like I could stretch out the days between washes a bit more. I decided to finally try out an espresso rinse in Week 5, and LOVED it!

Can you see the difference in body? The espresso enhances my curls as well!


I did use a honey mask after a failed experiment left me with some scalp irritation. Read Trial & Error below for more details.


What Am I Using Now?

Since I recently made some homemade yogurt, I had plenty of whey leftover (a byproduct of yogurt). I tried a whey rinse back before I made the switch to No Poo, and I loved it then. I had espresso, I had whey, and somehow they ended up together in my hair. It was awesome, and the smell was delicious! My favorite part was that it was the closest to a lather I've gotten since going No Poo! The whey has a bit of a thickness to it, and that's what sort of feels like it's lathering up. I've also been experimenting with adding a ginger/rosemary tea to the mix (simply ginger and rosemary boiled in water and steeped for about 20 minutes). I usually leave it in for a while, but it works pretty well as a quick rinse too. This is just a personal preference, but I like to apply the espresso/whey mixture over the kitchen sink, then wrap my hair in an old, clean T-shirt and allow it to dry before rinsing it out with water.

Acid rinses (like apple cider vinegar, certain teas, and coffee) are not technically washes; they're considered a conditioner, so you can use them daily if your hair responds well to it.


Since the Switch

Since I've quit using a honey wash every week, and have switched to acid only (AO) rinses (espresso and whey, specifically), my hair has had so much more body! My hair loves espresso! I usually do them every other day, but they are fine to daily as well.


Trial & Error

One thing I sometimes miss about shampoo is the smell. My hair doesn't smell bad at all; it just doesn't have a smell. Sometimes I miss that freshly shampoo'd smell (think flowers or fruit), although not enough to actually use any. I decided to try a little scent experiment with vanilla extract. I don't have any EOs (essential oils, for you EO virgins like me), but I have seen vanilla extract in some DIY recipes (for lotion or soap perhaps). Well for those of you who don't know, most vanilla extracts are made with alcohol and sugar or corn syrup. Although alcohol is found in many commercial shampoos (why?), it's extremely drying. After going this long without commercial shampoo, even 10 drops of vanilla extract was enough to inflame the scalp irritation that going no poo helped get rid of. The irritation was bad enough for me to use a honey mask the next day, which helped immensely. Lesson learned: don't use vanilla extract on my hair.

Some people like to leave their conditioning rinses in, and I though it would be great to try with espresso! Wrong. It left brown marks on my hands anytime I ran my fingers through my hair. It also left my hair feeling a bit stiff... I'm not sure that's the right way to describe it, but I can't think of a better word for how my hair felt. I'm going to stick with rinsing the espresso out. 


Unexpected Benefits of Going No Poo


  • Stronger nails - since giving up shampoo I've noticed that my nails have gotten stronger, but especially since using my orange/rosemary herbal tea rinse on my hair; just the act of rubbing it into my scalp was enough to strengthen them. I wish I had a before and after picture to show you. My nails usually break off right above the pink, but in the last few weeks, they've gotten unbelievably strong! Since I don't use the herbal tea rinse anymore, I'd like to incorporate it into a nail care routine. 
  • New hair growth - believe it or not, those little hairs I circled below are actually new growth! I attribute it to the rosemary in the rinses I've been using (rosemary is great at strengthening hair and even promoting new growth), along with the fact that I haven't been using any harsh chemicals on my hair or scalp!
    I'm sure these little hairs are new growth and not breakage for a few reasons:
    1) I haven't been doing anything to cause split ends (tying my hair up, using harsh chemicals, brushing too hard and/or too often).
    2) I examined them to make sure there were no frayed or stressed ends. 

For more information on breakage and new growth, check out Hairfinder.com.


The most important thing I've learned from all of this is to experiment! Every wash or rinse you try won't work for you, but when you come across what does work for your hair you'll be over the moon. I thought I had found what worked for me with honey, but if I didn't experiment with new wash methods I wouldn't have found this better working one!


To read about the rest of my journey, click here: 

Sunday, December 14, 2014

Going No Poo - Week 5


This week begins my 2nd month without commercial shampoo! Last week I promised that I would take a picture of my hair everyday, and I actually remembered! I "wash" with honey on Sundays and go the rest of the week with acid rinses (ACV, herbal tea rinses, and now coffee!), about every other day.


This week has had a lot of hair-firsts for me, so let's talk about those instead of the usual day-by-day routine! It's getting a bit repetitive since a routine has developed.

Remember, this is all still pretty new to me, and I'm by no means an expert. Every hair type is unique, so yours may not respond the same way mine has to these treatments.


First Haircut Since Going No Poo


I mentioned in Week 3 that I needed a trim, and was curious as to what my hairdresser would say about not shampooing anymore. Well, I finally got that trim, and it was probably one of the highlights of my week! I was very nervous about this appointment, because I was afraid they would think I was weird/dirty/crazy... in fact, I felt like I was going on a date! I had butterflies in my stomach, and I kept wondering, "what will she think?"

When it came time to wash my hair, I politely asked Ashley (we have the same name!) if she could simply wet my hair without shampooing it. She asked why, and I explained that I quit using shampoo a month ago and my reasons for doing so.  She completely surprised me by being awesome and supportive! She listened thoughtfully to what I had to say without judging, and actually told me she thought what I was doing is cool! Her only concern was whether or not honey is actually removing product buildup from my hair. She recommended using a acid such as lemon juice to remove buildup, and I let her know I rinse with apple cider vinegar (ACV). We then had a lovely discussion on how awesome ACV is, and she let me know that she uses it once a month!

A lot of folks in the group I belong to on Facebook have talked about how their hairdressers tell them their hair is severely damaged, or they just don't believe in not using shampoo. Some mentioned their stylist talking them into a shampoo while they were there and they regretted it. I can't advise anybody on what to do in this situation, only offer my own perspective. If my stylist would've insisted on a wash, I would have just left. I'm sure there are plenty of other places that will take my money even if I don't let them wash my hair, and I've worked too hard avoiding "full poo" products (other than some occasional hairspray). After hearing some of these stories, and even how some people feel forced to trim their own hair out of embarrassment, I feel extremely lucky to have found an awesome stylist that is supportive. I will definitely be going back to see Ashley again!


First Event Since Going No Poo

I really wish I had taken this before the party and not after.

Another highlight from this week is that I went to a Christmas party! You may be wondering how this is related to not using shampoo, but I promise it is! It was a big milestone in my no poo journey, because it was the first semi-formal event that I've gone too since giving up shampoo! I felt confident about my hair, and not at all self-conscious. I even took the opportunity to wear a dress!


First Espresso Rinse

Leftover espresso in my hair & used grounds on my face.
Needless to say, I smelled yummy!

I mentioned using coffee as a hair rinse in my post on Herbal Tea Rinses, and I finally got around to trying one! Most use coffee, but I only have an espresso machine. So don't fret if that's all you have as well. My favorite beauty/health treatments are the ones that don't cost any extra money, and this one fits the bill! I always end up with extra espresso in my carafe, and I know a lot of other people have the same problem with their coffee. Pouring it down the drain is such a waste! Why not use that leftover coffee/espresso as a conditioning hair rinse?

My Method/Experience:

I used the espresso while it was still lukewarm, with about a teaspoon of honey and a splash of lemon juice. Please be careful not to use the espresso while hot; it can cause serious burns! I applied it with a squirt bottle (think old, clean ketchup bottle) to dry hair (it's very DARK and messy, so I suggest standing over the tub or shower), massaged it into my scalp and through the length of my hair, and wrapped it in a clean T-shirt. Although you don't have to leave rinses in like a mask, I ended up leaving mine in for about an hour. This is perfectly okay - in fact, some people don't even rinse them out. (I may try it next time!)

I LOVED this rinse! Don't get me wrong, I love my apple cider vinegar (ACV) rinse too, but the espresso was a nice change of pace. 
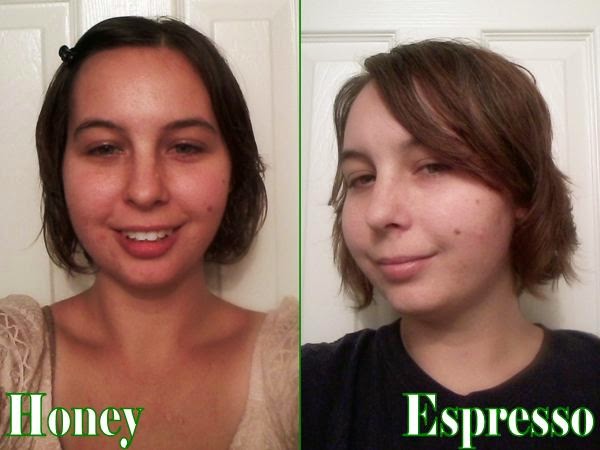
First of all, OMG the SMELL!!! This might not be normal, but I totally wanted to eat my own hair. The smell faded after my hair dried, just like the ACV, but the smell in the meantime was divine! It also left my hair lustrous (shiny, not oily!), soft, and with more curls! I know that coffee is great for naturally highlighting dark hair, so I can't wait to see how it looks after a few more rinses!


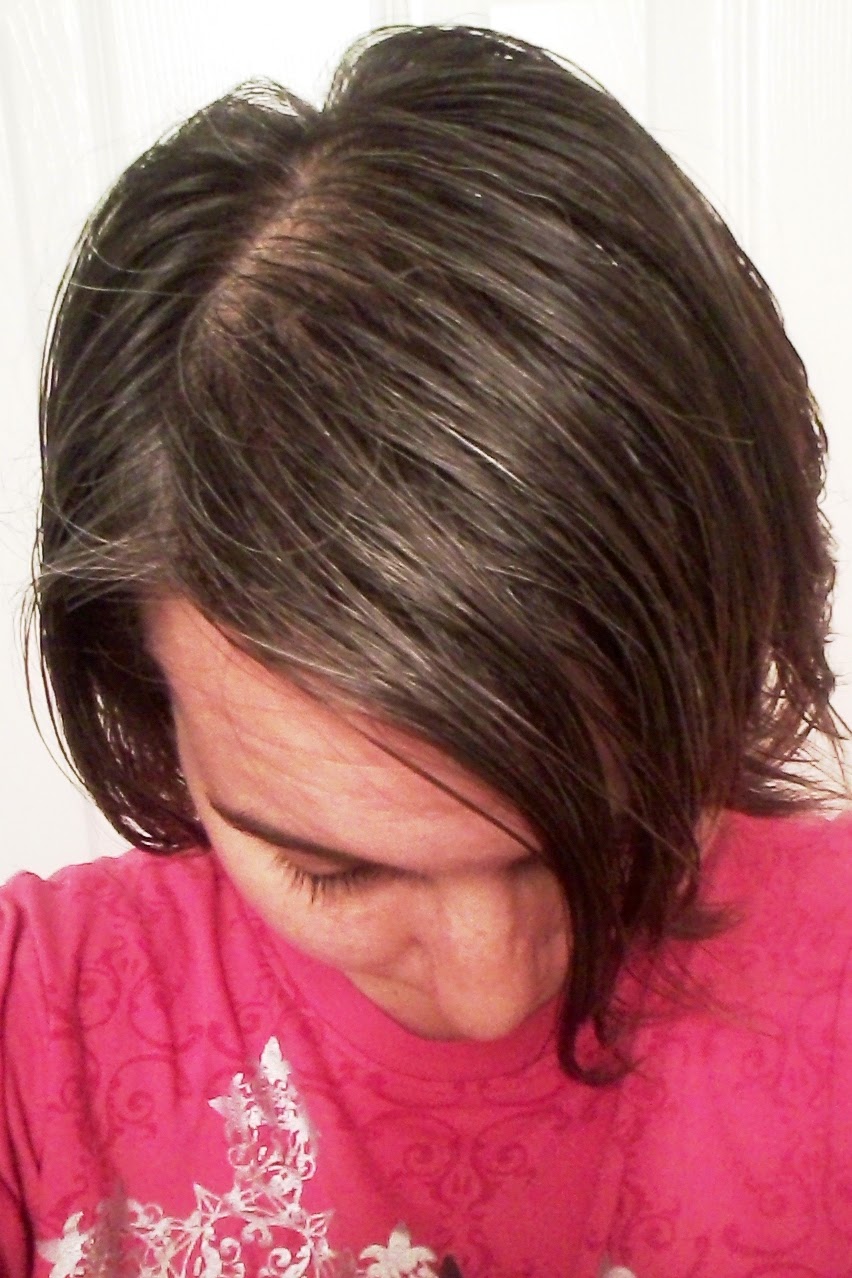
This is my hair after the espresso rinse and air drying.
Look at those curls starting to happen on the sides!


First Time "Plopping"


A lot of girls in the No Poo group on Facebook have been talking about plopping. If you don't know what plopping is (I sure didn't), it's basically flipping your head upside down and wrapping your moist hair in a T-shirt to accentuate your natural curls. If you let your hair dry like that, then you should have nice, bouncy curls. Well, it didn't work so well for me. Maybe I didn't do it right, or maybe my hair is too short. Either way, I think my curls look more defined when I wrap my hair in a T-shirt the same way I do a towel.


Plopping
Just letting it dry wrapped in a T-shirt
(like a towel)

 For more detailed plopping instructions, click here.


A few important tips I've learned in the last 5 weeks:

  • Boar bristle brush (BBB) my hair before washing
  • Pour wash or rinse onto dry hair rather than wet
  • BBB dry hair only to avoid breakage and split ends
  • BBB hair from all directions (forwards, backwards, away from the part), making sure to flip hair over and BBB underneath as well
  • Stretch out washes longer with acid rinses (ACV, tea, coffee)
  • Experiment to find what works!


If you're curious about the rest of my journey, you can read about it here:

Sunday, December 7, 2014

Going No Poo - Week 4 (& How to Clean Your Boar Bristle Brush)


Wow, one month! When I first started this journey, I couldn't imagine getting to this point. Some people are still going through transition after 4 weeks, so I'm very grateful that I've had such a good no poo experience.


One Month In:

I was washing every 3-4 days, as needed, but my oil production has seriously slowed down. I've actually developed somewhat of a routine for my hair now! I mentioned last week that I'd like to only wash my hair once a week, and I got there sooner than expected! For the last 2 weeks, I've been able to stretch out my washes by 7 days! I didn't think to take a picture everyday until just now, but I will definitely do that for Week 5.

My "wash day" is on Sundays, and I'm able to get through the rest of the week by using my herbal tea rinse every other day (a mixture of oolong tea, apple cider vinegar, and herbs; read all about it here). I've also been applying my honey shampoo (or herbal tea rinse, if I'm not shampooing) to dry hair, since receiving a tip from a no poo peer. On days that I don't use honey or my herbal tea/ACV rinse, I do a water only wash (if I shower).

What has changed since Week 1:


Healthier Hair -

I'm happy to say that my scalp irritation has improved dramatically! I may notice a sore spot every few weeks, but they are completely cleared up after my honey masks. I've also noticed WAY less hair loss in the last month. I never realized how bad of a problem it actually was until I saw how much hair I WASN'T loosing in the shower. My hair is now naturally shiny (in a good, non-oily way!), softer, and easier to manage.

Money and Time -

I know I've saved money since giving up hair products (except for the occasional spritz of hairspray, although I plan on experimenting with a sea salt spray soon), but I honestly have no idea how much. I don't really know how long it took me to go through a bottle before the switch, but I can get a pretty good size jar of honey for $9 from a local beekeeper. There are no markings on the container (it's just a mason jar), but it looks to be about 12-16 ounces. On top of that I dilute it with water (about 1:1) and only use it once a week now, compared to commercial shampoo which was every at least every 3 days. I bought a brand new jar of honey at the beginning of November, and  it's still more than 3/4 of the way full after a month.

As for time, I brush my hair less often, wash my hair once a week, and spend less time worrying about an itchy, painful scalp!

I know I'm super lucky, because not everybody has the option of buying local, raw honey. That stuff can get pricey if you're buying it in health food stores or grocery stores, so honey may not be the best method for saving money if that's the case for you.


My routine for the last week:

  • Sunday - Honey wash/mask
  • Tuesday - Oolong tea/ACV rinse 
  • Thursday - Oolong tea/ACV rinse
  • Saturday - Oolong tea/ACV rinse

This week has been pretty uneventful, other than having some pretty great hair days.


Monday (Day 21)
Look at those curls starting to happen!
Sunday (Day 27)
Still looking good after a week!

Can you believe these two photos are a week apart, and that I didn't wash my hair at all in between?


How to Clean Your Boar Bristle Brush:

Last week I briefly discussed cleaning your boar bristle brush (BBB), but I'd like to give you a more thorough walk-through. I was cleaning 2 separate brushes at the same time while taking these pictures.


What you need:

Your brush, some old shampoo (or dish soap), and a towel.


Step 1:

Remove all of the hair from your brush (I might have forgotten to do this part first).


Step 2:

Wet the bristles.


Step 3:

Apply a small amount of old shampoo (or dish soap) to the bristles.

Step 4:

Scrub with your hands (or an old toothbrush).

Step 6:

Rinse the brush thoroughly, especially the bristles.

Step 5:

Lay the brush on a towel to dry, bristles down.
His & Hers

Step 6:

Allow the brush to dry.
I actually forgot about my brush drying and didn't check on it for 3 hours, but it was dry by then.

Some folks suggest soaking your brush in a bowl of water before scrubbing it, but others have told me this can damage the wood and/or bristles, leading you to have to replace your brush more often. This makes sense to me, because water can damage wood over time. I'll leave it up to you which method you prefer.


Click here to read about the rest of my journey: