Showing posts with label oily. Show all posts

Thursday, April 23, 2015

Going No Poo: 5 Months (Deep Conditioning Mask & Egg Yolk Wash)


I can't believe it's been 5 months since I took the leap into No Poo, and gave up shampoo! I honestly cannot imagine ever using shampoo again!

I gave WO (water only) washes a try these last few weeks, pretty much out of sheer laziness. In my ideal world, I wouldn't need to do anything to my hair other than wet it. Well, it didn't work out so well. I have hard water, and after a while those minerals left my hair feeling stiff and dry. I could tell that my limp and lifeless hair needed some moisture, so I tried a deep conditioning honey/coconut oil mask. I followed my oil treatment with an egg yolk and honey wash to make sure my hair wasn't left feeling greasy. The results were fabulous!

Definitely one of my Top 3 best hair days
since Going No Poo!


Honey & Coconut Oil Deep Conditioning Mask


  • 2 Tablespoon Raw Honey
  • 1 Tablespoon  Coconut Oil
  • 1 Teaspoon Filtered Water

Mix together all three ingredients in a container with a lid (a mason jar or a condiment dispenser, for example). Apply the lid (plugging the opening, if using a condiment dispenser) and shake, shake, shake! The goal is to combine the ingredients as best you can.

Apply the mixture to moistened hair (not dripping wet), making sure to massage into the scalp and pull it through the length of the hair. You'll definitely need something to contain this sticky, oily mess, like a shower cap. I just use an old long-sleeve shirt to wrap up my hair; the long sleeves wrap around my head nicely, and keep it in place. Leave the deep conditioning mask on for at least 30 minutes, or even longer if you like. I usually leave mine in for a few hours.

When you're ready to remove the deep conditioning mask, you'll need something more than water or diluted ACV (apple cider vinegar) to get the coconut oil out. If you use regular shampoo, you can remove the oil with that. However, if you've given up commercial shampoo already, an egg wash works wonders at removing oil! Read on for the egg yolk/honey wash recipe.


Egg Yolk & Honey "Shampoo"


  • 2 Egg Yolks
  • 1 Tablespoon Raw Honey

Mix the egg yolks and honey together thoroughly (use an immersion blender to quicken the job).

Rinse the honey/coconut oil mask from your hair as best you can. Apply the egg yolk/honey mixture to your hair, massaging into the scalp and pulling it through the length of the hair. You may need to double the recipe if you have long hair. Leave the wash in while you finish up your shower routine, or for about 5 minutes, and rinse it thoroughly with lukewarm water (you don't want to cook the egg yolks).

You may follow with a diluted ACV rinse if you wish, but it is not necessary.


Beware:

You can do this deep conditioning treatment without a wash, but be prepared to walk around with oily hair for a day or two. I just recently tried skipping the wash, and it was pretty oily the first day, but my hair eventually absorbed it.

Try not to wash with egg yolks more than once a week, and no more than once a month for the whole egg. They contain a lot of protein, and too much protein can lead to dry, brittle hair that breaks easily. If you suspect protein overload in your hair, moisturizing is the only option.


Bye-Bye BBB

In the last month, I've given up the BBB (boar bristle brush), for the most part. I just can stand how often it needs to be cleaned, and how rough it is on my hair. I just purchased a cheap wooden comb off of eBay (seriously, it was only 80 cents), and so far it's working well. It moves sebum a bit better than a regular old plastic comb, without damaging my hair like the BBB did.


To read about the rest of my journey, click here:

Tuesday, February 3, 2015

Going No Poo - Week 12 (& Herbal Hibiscus Rinse)


In the spirit of minimalism, I've decided to minimize my stress and workload by making the Going No Poo series a monthly post rather than a weekly one. To be honest my scalp is so normalized that there isn't really anything new going on.

One of my main goals when starting this blog was to help others feel beautiful naturally, without having to conform to societies mainstream notion of what beauty is. I can honestly say that after three months without commercial shampoo, my perspective on hair has changed quite a bit. For example, my hair looked somewhat oily yesterday, and rather than think it was "gross," I thought: "my hair is softer than the the softest puppy I've ever felt!" Yes, that was my exact thought. I hope this blog inspires even one other person to feel the same way, rather than worry about what everybody else will think.

My monthly No Poo progress.
Check out those natural waves happening!

One thing that I have noticed is that my hair does not like to settle into a routine. As soon as I find something that works wonderfully, my hair decides it's time to switch it up. For the last few weeks, I've been alternating between an apple cider vinegar rinse and a coffee/herbal tea rinse. I've finally gotten my tea rinse to the perfect ratios (for me), so here it is:

Herbal Hibiscus Rinse


For my herbal tea rinse, I simply mix all of the ingredients together and pour it over my head. Applying this rinse over the sink (onto dry hair*) is the easiest method for me. I put a large mixing bowl in the sink to catch most of what I pour over my head, that way a little rinse goes a long way.

I also add a drizzle of honey occasionally (about a teaspoon), particularly if any irritation pops up (like during the winter months).

*I apply the mixture to dry hair, rather than wet, because of hard water issues. 

For the Hibiscus Tea:

I boiled 2 hibiscus tea bags in 1 cup of water for 5 minutes, and then let it steep for about 30 more minutes. Mine reduced to a 1/2 cup by the time all the boiling/steeping was done, but you can save the leftovers in the fridge if you wind up with more than half a cup.

For the Rosemary/Ginger Tea:

I boiled a fresh piece of ginger (about an inch long), 2 tablespoons of dried rosemary, and a teaspoon of ground turmeric in about 2 cups of water for 5 minutes, and then let it steep for 30 minutes. Since this herbal tea has loose herbs, it's best to strain with a coffee filter before using. As with the hibiscus tea, you can store the leftovers in the fridge.

Strongly brewed coffee can be used in place of espresso. 


Behold my healthy scalp, free of irritation and/or dandruff!


To read about the rest of my journey, click here:

Sunday, January 18, 2015

Double-Duty Orange-Infused Vinegar: Hair Rinse & Household Cleaner!


This post was originally inspired by a Facebook post (click here to see it).

I've mentioned before that I love double-duty DIY products! Reusing tea bags and leftover coffee for conditioning hair rinses, and old coffee grounds as a facial scrub are just some examples. Well, I was peeling a mandarin orange for my son one day and I thought, "These smell too delicious to just throw down the garbage disposal!" (Although, that is one way to repurpose orange peels and freshen up your disposal. Can you say "double-duty?") I then remembered that my mom had shared a post to my Facebook page about soaking orange peels in vinegar for 2 weeks to create your own orange-infused vinegar! I had everything I needed, so I went ahead and tried it.

Basic Concept:

The instructions for this project were quite simple: fill a jar with orange peels, cover the orange peels with vinegar, and let them soak for 2 weeks.

I actually made two different batches. I decided to add rosemary and a cinnamon stick to one jar, because of their benefits to hair. A week later, and one sniff, let me know that the cinnamon/rosemary one will only be for cleaning! The cinnamon smell was so strong I wouldn't even dream of trying it on my scalp. Some folks actually experience a burning sensation with cinnamon, so I didn't want to risk it - especially considering how strongly it smelled. Thankfully, I had made one normal batch that could still be used for my hair.


Straining the Vinegar:

Strain the vinegar before using it (trust me, the rosemary and orange peels will clog your spray bottle). Simply place a strainer over a bowl or measuring glass, and pour the orange-infused vinegar into the strainer. You may need a fork to get all of the orange pieces out. I suggest letting them sit for awhile so that the excess vinegar can drip down.

I only took pictures while straining the vinegar with the orange peels.


The final product is orange-colored.
Save the orange peels and use them again!


For Cleaning:

If you're using your orange-infused vinegar for cleaning, like the rosemary/cinnamon one I created, then you only need to dilute it to  50% with water. Mine smelled incredibly strong because I used a whole stick of cinnamon (too much, by the way), so my ratio was more like 3 parts water to 1 part vinegar. I seriously recommend using a very small amount of cinnamon or just leaving it out all together.  Nobody in my household was a big fan. However, it was pretty great at removing hard water stains.

Add it to a spray bottle or squirt bottle to make cleaning easier.


For Hair:

If you've read any of my Going No Poo post, you might know that I'm a big fan of using apple cider vinegar as a conditioner. This orange-infused vinegar (you can use white vinegar or ACV) can also be used on hair! Dilute it to your preferred vinegar rinse solution. If you're a first-timer, you should start with 1 or 2 tablespoons of the orange-infused vinegar per 1 cup of water. The orange peels are great at removing excess oil, so you definitely don't want to overdo and remove too much of your natural sebum.


After You're Done:

Don't toss those orange peels yet! You can use the same orange peels and repeat the process all over again! I've only reused them once so far, but I'll definitely try it again after the second batch is done.


My Experience:

I absolutely loved the orange-infused vinegar! The orange, rosemary, and cinnamon one... not so much. It came in handy when the newest fur baby in our house had an accident on the carpet though - it definitely covered up the urine smell. Adding the cinnamon was a fail, in my opinion, but there was no way I was going to let it go to waste.


Sunday, January 11, 2015

Going No Poo - Week 9 (& Honey/Coconut Oil Mask for Dry Scalp)


How is everybody fairing during these winter months? This back-and-fourth, Florida weather is driving me a bit crazy. I know I should't complain, because some people are in the teens and twenties! It just bothers me that Florida can't make up it's mind. Seriously, how can it be 90 degrees one day and 60 degrees the next? Okay, I'm done complaining...

With the winter months comes dry scalp for a lot of people. It even got me this winter, here in Florida! I did another Moisturizing Honey Mask to soothe my dry, irritated scalp, but this one was just a bit different from my last one.

For this mask I used only 3 ingredients: honey, water, and coconut oil.


Honey/Coconut Oil Mask for Dry Scalp


  • 2 Tbsp Raw Honey
  • 1 Tbsp Water
  • 1/8 tsp Coconut Oil

Directions


  1. Mix all the ingredients together. 
  2. Apply the mask to the scalp, and work through to the ends of the hair. You may need to double the recipe if you have long hair. Using a squirt bottle (like a hair dye applicator) makes the process a lot easier, as does standing over the sink. 
  3. Wrap hair with an old, clean T-shirt or a shower cap, and leave the mask on for at least 30 minutes. The longer you leave it on, the better it soothes and heals scalp irritation. 
  4. Rinse with water. You can follow up with an apple cider vinegar (ACV) rinse if you'd like, but it's completely optional.


Success! This Mask did exactly what it was meant to do: soothed and
healed my scalp irritation without leaving my hair oily.


What else is new this week?

I finally got around to trying a hibiscus tea rinse! You may remember me mentioning hibiscus tea in my post about Herbal Tea Rinses. In case you don't, it is great for auburn/red hair and for bringing out natural red tones. I don't really have auburn hair anymore, but part of me hopped for reddish tones after using it. There haven't been any noticeable changes after 2 applications, although it does smell great! I'm still using my espresso rinses as well - in fact, I even mixed it with the hibiscus tea to produce a darker red.


Good "hair days" are a lot more common these days than they used to be. Even my bad hair days aren't really that bad. For comparison, I've posted a picture of the best hair day I've had this week along with a picture of the worst. Even at my worst, I didn't feel gross or greasy. I even went out with a friend... in public! *gasp*


To read about the rest of my journey, click here:

Thursday, December 4, 2014

Herbal Tea Rinse: Customize It For Any Hair Type!


Here in the South, we LOVE our sweet tea! I'm from Florida, and tea is something that most people around here have on hand, so I decided to experiment with it. I love the idea of an herbal tea rinse, because it's double duty: you can make a drink and a hair rinse with the same set of tea bags! Since I was running low on my apple cider vinegar (ACV) rinse anyway, I decided it was the perfect time to try it! I've read a lot about how different teas can be used as acid rinses (sort of like ACV, which is an acid rinse). They can even be added to your ACV rinse; that's what I did! Adding herbs to your tea while it's brewing brings a little something extra to the table, depending which herbs you use.

Different herbs benefit different hair types, as do different teas (and coffee!), and that is what makes this tea rinse customizable: you can make it using the ideal tea and herbs for your hair type! I'll list some of the most common herbs and teas, and which hair type they benefit. First, I'll give you the rundown on the herbal tea that I made specifically for my hair: Herbal Oolong Tea Rinse.

My Herbal Tea Rinse:

For my herbal tea rinse, I brewed up some oolong tea that I happened to have sitting around since ordering Chinese takeout. I also threw in some mandarin orange peels and rosemary. I mixed the (cooled) herbal tea in with my diluted ACV rinse. However, I later learned that my hair prefers the tea diluted: about 1 part oolong tea to 3 parts water (read on for more details about diluting the tea).

If you prefer to get more bang for your buck, you can brew the tea bag per the normal directions for drinking. After your tea is brewed, remove the tea bag and boil it again for your hair rinse! If you're using this method, it may be best to brew the tea and orange peels/herbs separately (as I describe below) so that they don't interfere with the flavor of the tea. Although I have seen suggestions for brewing sweet tea with orange peels for a citrus flavor, so who knows!

But why did I choose these particular ingredients, and what are their benefits?

  • Oolong Tea - the high level of antioxidants in oolong tea prevents hair loss. Oolong tea also softens hair, while adding shine and luster.
  • Orange Peel - due to their anti-inflammatory properties, orange peels make a great dandruff remedy. Orange peels are also great for reducing oil. (They also smell great!)
  • Rosemary - it stimulates the follicles, causing hair to grow longer and stronger, and is believed to slow premature hair loss and the graying of hair (Source: Organic Facts). Ideal for dark hair.

The cookie is for eating while your tea is brewing!


Method/Results:

I brewed all three ingredients in 1 cup of water for about 5 minutes, and then allowed the tea to cool. After it was cool, I strained it (cheesecloth or a coffee filter may be required), and added it to my ACV rinse. However, the undiluted rinse left my hair stringy and greasy-looking after 2 days. That's unusual for me now; I can make it at least 4 days without looking too oily. I didn't want to give up this experiment after one little hiccup, so I decided to try diluting the oolong rinse I'd already made (my ratio was about 1 part oolong tea to 3 parts water), and that did the trick! I'm so glad I stuck with it!


I brewed orange peels and rosemary in water to dilute my
oolong tea with, since the undiluted tea left my hair oily.

After discovering that my hair preferred the tea rinse diluted, I decided to boil the orange peels and rosemary in water, and dilute the oolong tea with the orange/rosemary water. I did this so that the orange/rosemary smell wouldn't be weakened, but you can boil them all together if you find that easier. 

This time I boiled the orange peels and rosemary in 2 cups of water for about 10 minutes, allowed it to cool, and strained it. I steeped the oolong tea bag in 1 cup of boiling water for about 20 minutes (I actually lost track of time, but it was at least that long), and mixed it with the strained orange/rosemary water.

When I first tried this oolong tea/ACV rinse last week (read about it here: Going No Poo - Week 3), I loved the smell but had to do some more experimenting to figure it out. So remember: this no poo thing is NOT one-size-fits-all; experiment and figure out what works for you.

I want to clarify that this herbal tea is what works for me. Every individual is different, so my method may not work for the next person. I'm simply sharing my experiences as I go, and I'm in no way an expert.


Customize your tea with other options!


Teas:

  • Green Tea - (can be used on light or dark hair) prevents and treats dandruff and psoriasis, stimulates hair growth, softens hair, and adds luster (Source: STYLECRAZE)
  • Oolong Tea - (can be used on light or dark hair) prevents hair loss and shedding, softens hair, and adds shine and luster (Source: STYLECRAZE)
  • Black Tea - (dark hair only) increases hair thickness, fights hair loss and stimulates hair growth, darkens grays, and brings out natural highlights. It also adds shine, luster and natural darkness (Source: STYLECRAZE)
  • Coffee - (dark hair only) adds luster and more intensive tone to brown hair, stimulates hair growth, conditions, and adds natural shine (Source: STYLECRAZE)

 Herbs (by hair type & benefit):


All-Purpose:
  • basil
  • fennel seed
  • peppermint
  • rosemary
  • sage
Dark Hair:
  • cloves
  • rosemary
  • sage
Light Hair:
  • chamomile flowers
Revitalizing:
  • basil
  • ginger root
  • marjoram
  • peppermint
  • rosemary
Dry Hair:
  • burdock root
  • sage
Oily Hair:
  • lemon peel
  • orange peel
  • lemon grass
  • peppermint
  • rosemary
Auburn/Red Hair:
·         hibiscus

Conditioning:
  • burdock root
  • catnip
  • lemongrass
  • rosemary
There are many more herbs with benefits to different types of hair, however I only listed the most common. (Source: Frontier CO-OP)

Try creating your own unique herbal tea rinse! You can even experiment with different rinses to create more than one! For example: one for oily days and one to help with scalp irritation...

Please comment and share the herbal tea rinse you create!


Sunday, November 30, 2014

Going No Poo - Week 3 (& Hairstyles for Transition!)


Wow, I can't believe I'm actually in my third week without shampoo! For those of you that have been following along on my no poo journey, thank you so much!

For those of you new to my no poo journey, check out Week 1 & Week 2!

Some of you may be wondering about the abbreviations I use sometimes, so I decided to make a short list of the ones I use most often:
  • WO = water only
  • ACV = apple cider vinegar
  • BBB = boar bristle brush
  • SMP = scritching (spelled with an "i"), massaging, & preening: very lightly making circular motions with the nails on the scalp, massaging the scalp with the pads of the fingers in a circular motion, and pulling the oil down the hair shaft with your fingers or palms.

It is officially Day 16 (Wednesday) since I've used commercial shampoo. It's been 3 days since my last honey mask/wash (with a dollop of yogurt and a splash of lemon juice), and my hair is still feeling great! It's been pretty consistent about getting oily at the roots around the third day after a wash, but a WO wash (and sometimes and ACV rinse) along with a BBB can help stretch washing another day or two.

Speaking of BBB, guess what I just found out: you have to wash your boar bristle brush! This makes sense to me, because the bristles are actually hair, and hair needs to be cleaned. Mine is recently bought, so thankfully I found out before it got yucky.

According to members in the no poo group that I belong to, how often you wash it is on an as-needed basis. So if you have oily hair (if you're going through transition, for example), you'll need to wash it more often than somebody with dry hair. I suppose it also depends on how often you brush your hair. I only use my BBB every few days, and use my fingers to brush the rest of the time. Some folks suggest once a week cleanings for your BBB, but if you don't brush that often (like me) then you'll be able to stretch out brush cleanings by a lot more.

Apparently they take a very long time to dry because the bristles are packed so closely together, so don't clean your brush if you have to be somewhere (with brushed hair) in 30 minutes.


Boar Bristle Brush
Image Source: Think Before You Buy

I'll go into more detail on how to clean your BBB next week, but here is the gist:
  • Remove all of the hair from your brush
  • Wet your brush, apply soap (or your old shampoo), and scrub with your hands or an old toothbrush
  • lay on a towel to dry, bristle side down
  • allow to dry before using (I'm not sure how long this takes yet)
 *****************************************
It's Day 17 (Thursday), and Thanksgiving! Care to guess what I'm thankful for this year (other than the best son in the world)? I'm thankful that my family is so understanding and supportive of my no poo journey! A lot of people who begin this journey get discouraged by family members, so I'm definitely counting myself lucky!

It's been 4 days since my last honey wash/mask, and my hair is pretty greasy! Up until now, I've been washing with honey if my hair gets this oily, but I'm going to try stretching it one more night with an ACV rinse. I'd like to get to the point where I only need to wash once a week, eventually.

 *****************************************

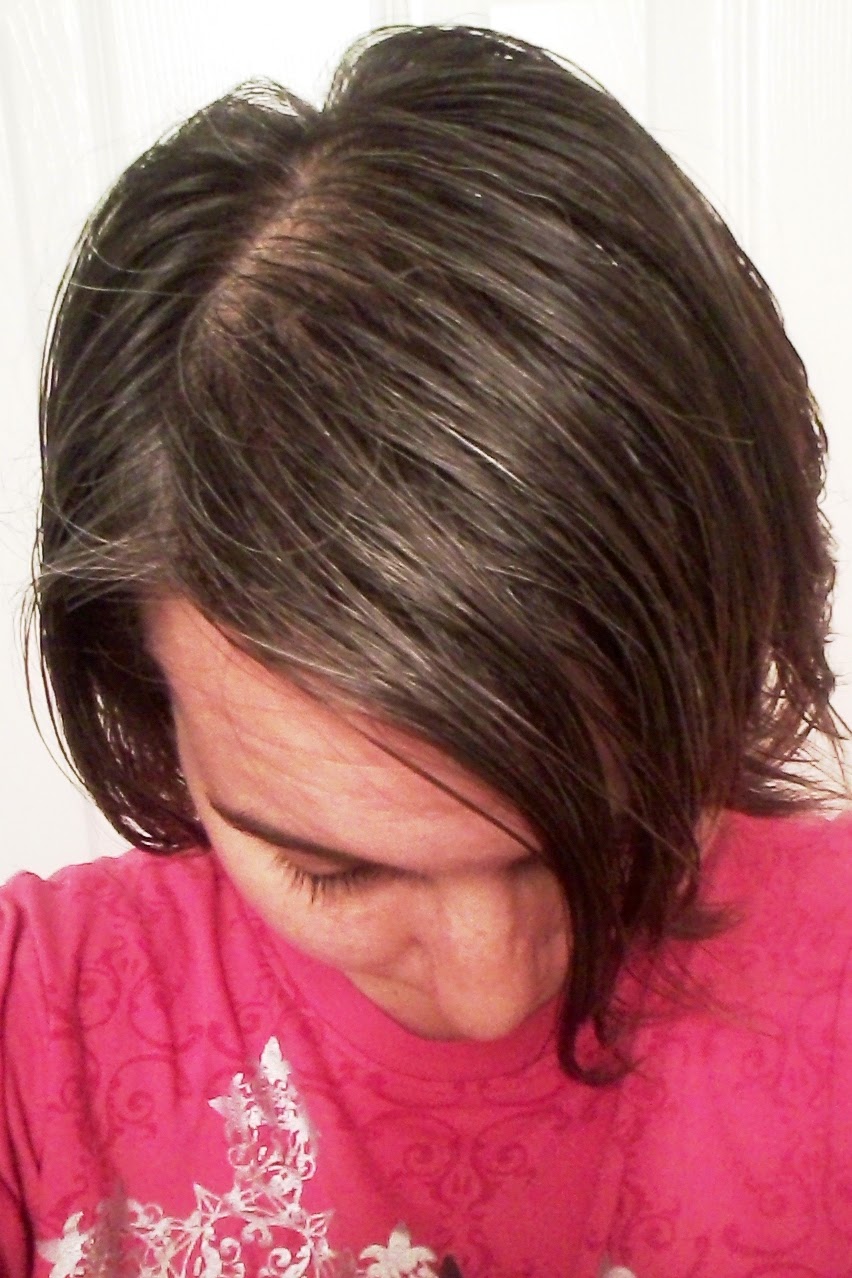
Friday (Day 18): before Oolong/ACV rinse


Today is Day 18 (Friday), and I'm pleasantly surprised by how good my hair is doing this long after a honey wash. As I already mentioned, the last 2 weeks my hair has gotten oily enough for me to wash it around 3 or 4 days after a wash. However, I decided to keep pushing past my usual wash day... basically just to see what happens. At worst, I figured I just wouldn't leave the house (thank goodness for the holiday break, and not having to go anywhere). I planned on doing an ACV rinse last night, but I never got around to it. I definitely couldn't get away with skipping the ACV rinse today, but I tried a few new things:
  • I only had a little bit of my ACV rinse left, and I've been wanting to experiment with tea rinses, so I brewed up some oolong tea with mandarin orange peels and rosemary to mix right in with my ACV solution. (I plan on going into more details in a separate post, so keep an eye out!)
  • Thanks to a tip from someone from the no poo group I belong to, I decided to try putting the rinse on my hair while it was dry rather than wet. The theory is that dry hair will absorb the conditioner better than wet hair; if your hair follicle is full of water already it won't absorb the conditioner as well. However, I couldn't find any reputable sources for this information or science to back it up. I did notice that I used a lot more of the rinse to saturate my hair than I would normally use on wet hair, so that is something to think about.
After using the oolong/ACV rinse, I immediately noticed that it had a much more pleasant smell than just plain ACV and water - almost minty. It faded as my hair dried, but it was still nice while it lasted. After that, my hair just smelled like clean hair. It was still looking oily at the roots, so I waited for it to air dry to BBB. It still looked just a bit oily at the roots, but a little SMP solved that problem.

 *****************************************

It's now Sunday (Day 20), and I once again didn't get around to rinsing my hair last night. I blame schoolwork, and Thanksgiving. My kitchen is still not fully recovered from all of that cooking! Anyhow, I can't believe it's been 7 days since any kind of wash (other than water or ACV). There is no doubt that my hair looks oily, but I'm honestly surprised that it doesn't look worse. I think my little experiment of seeing how long I can go without washing is over - I have to take my son to school tomorrow, so I'll definitely be doing a honey wash tonight!
 *****************************************


No Poo Week 3 Breakdown:

  • Day 15 (Tuesday) - 2 days since my last honey wash/mask, and my hair feels great still.
  • Day 16 (Wednesday) - My roots are a bit oily. 3 days since my last wash, so right on time. WO wash tonight.
  • Day 17 (Thursday) - Happy Thanksgiving! My hair is pretty greasy today, so I'm going to use an ACV rinse tonight.
  • Day 18 (Friday) - Skipped the ACV rinse last night, but tried a new rinse today: ACV and oolong tea. Love the smell! I'm very happy with the results after letting it air dry, BBB, and SMP. I'm probably going to use a honey mask tomorrow, but I'll play it by ear.
  • Day 19 (Saturday) - My hair feels wonderful, but looks pretty oily. Pretty good for not washing it with honey in 6 days, though! My dark roots are growing out, so the darkness on top only adds to the oily looks. A haircut that gets rid of my over-dyed ends should help considerably; only one more week until my trim! 
  • Day 20 (Sunday) - My hair is visibly oily, but it doesn't feel dirty or greasy. I can easily run my fingers through it, and it feels healthy and soft. I plan on doing a honey wash tonight.
 *****************************************

Tips for dealing with oily hair:

  • Try to touch your hair as little as possible. Oil from your hands will only make your hair look greasier.
  • Don't forget to BBB! Your boar bristle brush will really help move the oil down the hair shaft, helping your roots look less greasy.
  • When the BBB isn't quite cutting it, SMP (scritching, massaging, and preening) helps to loosen up sebum, dead skin cells, and product buildup. Massaging the scalp also provides some lift to your roots, giving your hair some of the body the BBB takes away. Make sure your hands are clean, so you're not just adding to the oil!
  • Sometimes you have no choice but to hide it. Read further for ideas!


How to hide an oily hair day:

Even though I didn't really go through a transition period (yet!), I realize everybody is not as lucky. That's why I decided to share some ideas for what to do with your hair when it's just too darn greasy to wear down!

The "bump" and the headband are my go-to solutions on greasy days.
What a difference it makes!


Short Hair

Unfortunately there aren't that many ways to hide your oily locks if they're short like mine, other than scarves, bandanas, or hats. Seriously Google "scarf hairstyle" or "scarf hairstyle short" and be amazed at all the possibilities! Wide headbands are your friend also.

Long Hair

  • French braids, if you're good at it
  • The side braid, also known as the Katniss or Elsa braid
  • There's always the obvious ponytail or bun
  • Scarves, bandanas, or hats if you're in a hurry


Double Duty Long Hairstyles

These options are great because they help hide oily hair and look like you spent an hour styling them! Oily hair is actually better for these styles, because dirty hair is just so much easier to work with than clean. Sounds wrong, but that's why people have to put product in their clean hair to hold a style. Here are a few somewhat easy options, that don't involve French braiding (goodness knows that I can't do it):

http://www.pinterest.com/pin/526569381403185703/
Source: http://www.pinterest.com/pin/526569381403185703/


Source: http://www.gurl.com/2014/03/25/easy-no-heat-hairstyles-for-dirty-hair-long-short/


Source: http://www.gurl.com/2014/03/25/easy-no-heat-hairstyles-for-dirty-hair-long-short/

      What are some of your go-to styles on dirty/oily days?


    Click here to read about the rest of my journey: