Showing posts with label Greek yogurt. Show all posts

Saturday, June 6, 2015

5 Uses for Leftover Whey


I love Greek yogurt! In fact, I wrote a detailed blog post all about how to make your own (click here to read Homemade Yogurt). If you've ever made homemade Greek yogurt, then you know whey is a byproduct of the straining process, and you can end up with quite a bit of it.

What should you do with it? Throwing it away is such a waste, considering there are so many ways to use it!


1) Marinate Meat in Whey

I haven't personally tried this one yet, but (from what I've read), the enzymes in whey help to tenderize the meat. I couldn't find any reputable sources however, only other blog posts. It makes sense to me, since whey is slightly acidic. Whey has a pH of "less than or equal to 5.1" (Source: Handbook of Dairy Foods and Nutrition); that is around the same acidity of apple cider vinegar, which is "4.25 to 5.0" (Source: Testing the Acidity of Vinegar).

Here is an interesting recipe for a whey marinade that I plan on trying soon: Whey Moroccan Chicken Marinade.

2) Boil Pasta and Rice in Whey

This one I have tried! I've read that it alters the flavor a bit, but I haven't noticed yet. Neither has anybody I've cooked noodles or rice for. The only difference I've noticed is that the pasta is a bit more tender.

3) Rinse Your Hair with Whey

This is probably my favorite one! Whenever I do this, it leaves my hair silky, shiny, and softer than ever. Even before I gave up commercial shampoo (check out Going No Poo if you're curious about that), I rinsed with whey a few times. Whenever I did, I didn't need to wash my hair for up to a few days. Of course now I don't wash my hair at all, but I still love a good whey rinse! Just be sure not to get it in your eyes or mouth while rinsing.

4) Use Whey as a Substitute for Buttermilk

I've successfully used whey in a cornbread recipe that called for buttermilk, and even for buttermilk pancakes! I love that I don't have to go out and buy buttermilk just for a few recipes; I can use the whey since I have it on hand. I seriously recommend making French toast with whey (beat some whey into the eggs you'll be dipping the bread into). It makes the French toast slightly sweeter in my opinion.

5) Mix Whey into Your Coffee 

I always mix a few tablespoons of whey into my iced lattes. It adds another depth of flavor as well as some helpful vitamins and probiotics. Adding it to hot coffee might kill the probiotics, but it will still have a yummy flavor!


Do you have any uses for whey that I haven't mentioned? If so, comment below!

Saturday, December 27, 2014

Going No Poo - Weeks 6 & 7


I've been pretty busy with the 7 Days of Christmas, so I was pretty late getting to Week 6. The week was already almost over by the time I got any free time, so I figured I'd just combine Weeks 6 & 7.


Giving Up Honey

I seriously LOVE honey. I love it! Have I said that enough yet? Despite my love-affair with honey, I actually haven't washed with it since Week 4 (well, maybe a drizzle in my rinses here and there). It doesn't mean that I don't love honey anymore (I swear, I do!), it was just time to switch things up! I felt like my hair was getting too weighted down, and I also felt like I could stretch out the days between washes a bit more. I decided to finally try out an espresso rinse in Week 5, and LOVED it!

Can you see the difference in body? The espresso enhances my curls as well!


I did use a honey mask after a failed experiment left me with some scalp irritation. Read Trial & Error below for more details.


What Am I Using Now?

Since I recently made some homemade yogurt, I had plenty of whey leftover (a byproduct of yogurt). I tried a whey rinse back before I made the switch to No Poo, and I loved it then. I had espresso, I had whey, and somehow they ended up together in my hair. It was awesome, and the smell was delicious! My favorite part was that it was the closest to a lather I've gotten since going No Poo! The whey has a bit of a thickness to it, and that's what sort of feels like it's lathering up. I've also been experimenting with adding a ginger/rosemary tea to the mix (simply ginger and rosemary boiled in water and steeped for about 20 minutes). I usually leave it in for a while, but it works pretty well as a quick rinse too. This is just a personal preference, but I like to apply the espresso/whey mixture over the kitchen sink, then wrap my hair in an old, clean T-shirt and allow it to dry before rinsing it out with water.

Acid rinses (like apple cider vinegar, certain teas, and coffee) are not technically washes; they're considered a conditioner, so you can use them daily if your hair responds well to it.


Since the Switch

Since I've quit using a honey wash every week, and have switched to acid only (AO) rinses (espresso and whey, specifically), my hair has had so much more body! My hair loves espresso! I usually do them every other day, but they are fine to daily as well.


Trial & Error

One thing I sometimes miss about shampoo is the smell. My hair doesn't smell bad at all; it just doesn't have a smell. Sometimes I miss that freshly shampoo'd smell (think flowers or fruit), although not enough to actually use any. I decided to try a little scent experiment with vanilla extract. I don't have any EOs (essential oils, for you EO virgins like me), but I have seen vanilla extract in some DIY recipes (for lotion or soap perhaps). Well for those of you who don't know, most vanilla extracts are made with alcohol and sugar or corn syrup. Although alcohol is found in many commercial shampoos (why?), it's extremely drying. After going this long without commercial shampoo, even 10 drops of vanilla extract was enough to inflame the scalp irritation that going no poo helped get rid of. The irritation was bad enough for me to use a honey mask the next day, which helped immensely. Lesson learned: don't use vanilla extract on my hair.

Some people like to leave their conditioning rinses in, and I though it would be great to try with espresso! Wrong. It left brown marks on my hands anytime I ran my fingers through my hair. It also left my hair feeling a bit stiff... I'm not sure that's the right way to describe it, but I can't think of a better word for how my hair felt. I'm going to stick with rinsing the espresso out. 


Unexpected Benefits of Going No Poo


  • Stronger nails - since giving up shampoo I've noticed that my nails have gotten stronger, but especially since using my orange/rosemary herbal tea rinse on my hair; just the act of rubbing it into my scalp was enough to strengthen them. I wish I had a before and after picture to show you. My nails usually break off right above the pink, but in the last few weeks, they've gotten unbelievably strong! Since I don't use the herbal tea rinse anymore, I'd like to incorporate it into a nail care routine. 
  • New hair growth - believe it or not, those little hairs I circled below are actually new growth! I attribute it to the rosemary in the rinses I've been using (rosemary is great at strengthening hair and even promoting new growth), along with the fact that I haven't been using any harsh chemicals on my hair or scalp!
    I'm sure these little hairs are new growth and not breakage for a few reasons:
    1) I haven't been doing anything to cause split ends (tying my hair up, using harsh chemicals, brushing too hard and/or too often).
    2) I examined them to make sure there were no frayed or stressed ends. 

For more information on breakage and new growth, check out Hairfinder.com.


The most important thing I've learned from all of this is to experiment! Every wash or rinse you try won't work for you, but when you come across what does work for your hair you'll be over the moon. I thought I had found what worked for me with honey, but if I didn't experiment with new wash methods I wouldn't have found this better working one!


To read about the rest of my journey, click here: 

Tuesday, December 23, 2014

7 Days of Christmas: Day 6 - Cheap, Last-Minute Christmas Gifts!


If you're like me, and you wait until the last minute to buy/make Christmas gifts, then these quick, cheap, and last-minute options will be right up your alley!


Homemade Teriyaki Sauce


Spoiler Alert for anybody we give gifts to: this is what you're getting this year. Hope you like Teriyaki! I can't remember where I got this recipe for the life of me, but it's extremely simple. What I love about this gift is that it's practically free. We up-cycled old lemonade bottles for the container, and we usually have all of the ingredients on hand. All I did for the label was print some business card size labels in Microsoft Publisher, punched a hole in each one, and tied them around the bottles with a ribbon.

Teriyaki Recipe

Ingredients
  • 1-2 teaspoons oil (for coating pan)
  • 1/2 teaspoon Ginger, grated (about 1/2 inch piece)
  • 1 tablespoon Garlic, minced (about 2-3 large cloves)
  • 1/2 cup Water
  • 1/2 cup Soy Sauce
  • 1/2 cup Brown Sugar
  • 1/2 teaspoon Red Pepper Flakes (I use 1/4 tsp.)
Directions
Heat the oil in a wok or saucepan on medium-high heat. Add the garlic and ginger to the pan first, immediately followed by the rest of the ingredients. Cook for 2 minutes and remove from heat. Use immediately, or allow the sauce to cool and put it in a container. 


Cookie Bars


These are even easier than regular cookies, in my opinion, making them perfect for the last minute. They're less time-consuming because you don't have to form individual cookies; just press the dough into a casserole dish and cut it into bars after it's baked and cooled. I originally used this recipe for leftover Halloween candy, but you can easily find Christmas colored candy to use (think red and green M&Ms or candy cane pieces).


DIY Ornaments


The baking soda ornaments may not be the quickest gift to make, but if you've already made them they're a breeze to handout as a last-minute gift. You may want to remember that for the years ahead: these homemade ornaments can be a day of fun with your family and presents!

The puzzle ornaments, on the other hand, can be made fairly quickly... about as long as it takes to put the puzzle pieces together, Mod Podge them, and let the dry.


DIY Beauty Products


Honey, Yogurt, & Lemon Face Mask


Back in November I posted a recipe for a honey, yogurt, and lemon face mask that makes a wonderful gift idea. Just be sure to remind the recipient that this mask needs to be refrigerated when not in use. Check it out here!


Herbal Tea Rinse


This is also a wonderful gift idea, because it can be customized for any hair type. You can make a blend specifically for hair loss, oily hair, or just a general use rinse! Check out the post here for different tea blends!


Monday, December 15, 2014

Homemade Yogurt


I love yogurt. Especially Greek yogurt - it's so versatile! It can be eaten sweet (think fruit or honey) or it can be made savory (seasoning and extra virgin olive oil, for example), and it's a wonderful substitute for many things (sour cream and heavy cream, just to name a few). Some people I know hate it though, and to them I say "This recipe can make either Greek or regular style yogurt!"

The only difference between Greek and regular style yogurt is that the Greek version is strained, and therefore thicker.


Whether you're making Greek or regular style yogurt, follow all the directions until you reach the section about straining. At this point, there will be two sets of instructions: one for Greek style and the other for regular yogurt.

*All temperatures in this post are in Fahrenheit.*

Things you will need to get started:

  • Slow cooker or large pot
  • Thermometer (instant read or the type used for deep frying/candy making)
  • Something for the yogurt to incubate in (oven, cooler, thermal bag)
  • Containers for the yogurt to incubate  in (jars, slow cooker, or even a pot)
  • Strainer (large enough to hold all of the yogurt, if straining)
  • Cheesecloth or coffee filters (if straining)
  • A bowl large enough to rest the strainer on and collect the whey, a byproduct of yogurt (again, only if straining)
  • A container or 2 to hold your homemade yogurt and the whey (that stuff is useful!)


Ingredients you will need:

  • Milk (skim, whole, or anything in-between; the higher the fat content, the more yogurt you get)
  • Starter yogurt (must be Greek yogurt, about 6 oz. for every gallon of milk; you can use your homemade Greek yogurt for this next time!) 


To get started, you'll need:
milk, starter yogurt, a pot, and a thermometer
If straining, you'll need:
A large bowl, a strainer, and cheesecloth (or coffee filters)

The basic concept:

  • Scald milk
  • Cool temperature down to 110-120 degrees
  • Add starter yogurt, mix
  • Incubate
  • Strain (optional)


Step-by-step:

Pour as much or little milk into the pot as you'd like.
The higher fat content the milk has, the more yogurt you'll get from it.

Scald -

To start the yogurt making process you need to scald the milk by heating it to 180 degrees. Stir regularly or you'll end up with a thick coating on the bottom of your pot.

Cool -

Next let it cool back down to 110-120 degrees (use your thermometer).
You can do this in a crock pot or on the stove, but be sure to keep an eye on the temperature; 110-120 degrees is the sweet spot for that good bacteria to reproduce and make your yummy yogurt! Keep stirring to avoid it sticking to the bottom of the pan.


Starter -

After the milk has been scalded and brought back down to 110-120 degrees, add your starter (about 6oz of Greek yogurt to 1 gallon of milk, store bought or from your last batch of homemade yogurt) and mix it together thoroughly.


Incubate -

If you used a crockpot, leave it in there or pour it into glass jars. (I made it on the stove, but used my slow cooker to incubate it. I've also just poured it into another pot in a pinch.)


Popular Incubating Methods:

  • Put the covered jars/crockpot into an oven that's been preheated for 1 minute and then turned off, with the oven light on.
  • Place the jars/crockpot inside a cooler with water that has been preheated to 120 degrees.
This is where I diverged from basically all of the recipes I read. My oven doesn't have a light, so I skipped that one (although I later found out that the light doesn't really matter). I'm also too lazy for the cooler method. I used a thermal shopping bag that keeps cold things cold or hot things hot. I stuck the whole crockpot in the bag, shut it tight, and wrapped it with a bath towel. I put it in a somewhat out-of-the-way place, and made sure to tell my family not to disturb it. It was thick around 5 hours later, but I let it go 8 hours just to be sure.


Avoid spilling your milk/yogurt mixture
by gently lowering it into the thermal
bag, if that's the method you're incubating
with. You may want to put it on the
floor to make this part easier.


Most of the recipes I read suggested letting the yogurt incubate for anywhere between 8-12 hours until thick like regular yogurt. If you're a scatterbrain like me, and you forget things a lot, then you'll be happy to know it won't hurt to leave it incubating for a long time. My record so far is 19 hours. I looked it up online and some people do recommend letting it incubate about that long for extremely thick and creamy yogurt. The good news is that nobody in my family got sick!
Allow the yogurt to incubate to your preference. The next step depends on whether you want Greek or regular style yogurt.


Here is the point in the process where you will either strain it for Greek style yogurt, or leave it as is for regular yogurt:


For regular yogurt:

If the yogurt is in a pot or a crockpot, pour the yogurt into containers (more than one may be necessary). If the yogurt is in jars, go ahead and put them into the refrigerator. When they are chilled through, they are ready to add flavoring or enjoy plain! Read further for flavoring suggestions.

For Greek yogurt:

Line a strainer with cheesecloth or coffee filters, and place over a large bowl. Pour the yogurt into the strainer, and place in the refrigerator. Allow it to strain until it's your desired consistency (be sure to cover with plastic wrap, a lid, or even a plate).


I did mine for about 8 hours, overnight while I was sleeping. When I woke up in the morning, I had thick, creamy Greek yogurt.
I've also accidentally forgotten about this part and let it strain longer than that. I just ended up with extra thick yogurt! I've also read comments on other blogs about straining it until it becomes like a tangy cream cheese, so there's always a Plan B if it goes WAY too long. I'm honestly not sure how long that would take though. You can also mix some of the whey back in until it's the desired consistency (I've done this before).


Before straining


After straining 8 hours

 The final product

Update: For ideas on how to use your leftover whey, check out 5 Uses for Leftover Whey!

Possible containers:

  • Tupperware
  • Jars
  • Old yogurt/butter/sour cream containers (Yay for recycling!)

Flavoring your yogurt:

You can flavor your yogurt once it's cool (you need to be able to do the "taste test"). I've personally never flavored my yogurt batch all at once; I prefer to flavor each individual bowl as I (or my son) eats it. That way I can use the plain Greek yogurt as a substitute for other things. I can personally attest that it works great as sour cream, and mixed with hard-boiled eggs for egg salad. Greek yogurt can also be used to cut calories in place of mayo, sour cream, and heavy cream or buttermilk (water it down with milk until it's the desired consistency for heavy cream or buttermilk).

Flavoring a large batch:

Many of the recipes I read suggested adding vanilla extract (some also mentioned sugar, but I suggest tasting it without first). You could also try experimenting with other extract flavors as well! Since I've never done this, I don't know any exact ratios for the sugar to vanilla (heck, I don't even know what size batch you're making). However, another blogger recommends:
"For a full 32 oz. container, I add: 
  • 1 teaspoon vanilla
  • a little less than a 1/4 teaspoon cinnamon
  • and 3 tablespoons powdered sugar"

Flavoring individual bowls:

Plain yogurt can also be eaten as a quick snack, flavored with some honey, fruit, and nuts or seeds; my son actually enjoys it with a bit of jelly and a drop of vanilla extract swirled in! What other mix-ins can you think of?


Tips for Success:

  • Stir regularly to avoid most of the yogurt
    getting stuck to the bottom of the pot. 
    Stir regularly. Don't  just walk away and forget about it, or you'll end up with half of the yogurt stuck to the bottom of the pot. The photo to the right is with stirring, so imagine without.
  • Moisten your cheesecloth before lining the strainer, if making Greek yogurt. It makes it form to the shape of the strainer much easier.
  • Start the yogurt at night, so you can leave it overnight to incubate. This is especially handy if you don't have anyplace "out of the way" to put it or if using your oven to incubate.
  • Don't be intimidated! This recipe/method is very hard to mess up. If you scald it over 180 degrees, it'll still be fine. If you incubate it too long (like I've done before), or strain it too long it can still be salvaged.
  • Save your whey! You can make ricotta with it, rinse your hair with it (I use it on my hair, and it's amazing), boil noodles or rice in it, or marinate chicken in it to make it super tender. Update: Click here to read 5 Uses for Leftover Whey!
Whey leftover after straining


Resources

I did a lot of research on the subject of making yogurt, and the basic concept was universal. Some of sources that helped me the most are:

Friday, November 21, 2014

Going No Poo - Week 2 (& Moisturizing Honey Mask for Split Ends)


Welcome to Week 2 of my no poo journey! Last week I left off on Day 8 (Monday). If you haven't read about my first week going no poo, check out Week 1!

So far so good this week, but it's still only Wednesday (Day 10). I've also been warned by fellow no poo peers (try saying that 10 times fast!) that sometimes "transition hair" doesn't kick in until Week 2 or 3! So now is the time to be wary... I'll keep y'all updated though.

I'm still using the honey washes as my no poo method, although my last honey mask/wash was 4 days ago. My scalp and hair still feel good, and I feel like I could probably go 2 more days without washing with honey. The oil is sitting at my roots a bit, so I think I'll definitely need a water only wash tonight to help distribute that sebum (maybe even a apple cider vinegar rinse). I've noticed that the hair around my face gets oily first, probably from touching it and pushing it out of my face so much. I did get a tip from somebody in my Facebook group though: if my hair starts to get waxy (from a buildup of sebum, products, or hard water), an applesauce mask will help! They made sure to tell me that only sugar-free applesauce  will do (baby food or homemade would work also). Sugar can have a bad affect on the hair and scalp.

I did notice some split ends where there is still color in my hair (I chopped as much off as I could 2 months ago, but there's still a bit of color on the ends). That means I will definitely need a trim soon, and I'm certainly interested in hearing what my stylist thinks about all of this.

No funky smells either! My hair just smells like clean hair. Not the kind of perfume/flowery-clean that you may be used to, but there is definitely no stink.

****************************************

It's Thursday (Day 11) now, and my hair is still looking great other than some split ends. I found out the hard way not to brush with a boar bristle brush while the hair is wet; apparently the hair is very weak while wet, and brushing with anything other than your fingers or a wide-tooth comb can stretch and tug hair leading to breakage and split ends. Lesson learned. Hopefully a honey mask tonight will help tame them until I get a trim in a couple of weeks. I'm also avoiding brushing as much as possible until then, using my fingers instead.
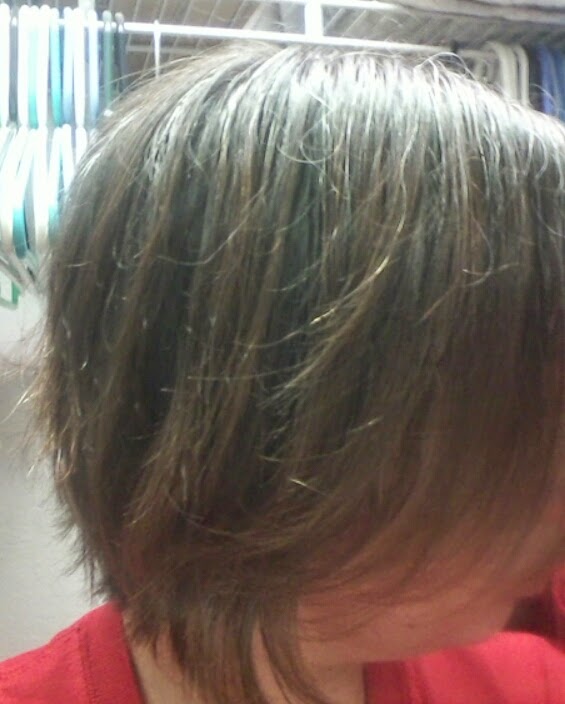
After my ACV rinse last night (Day 10).
It's clean, but look at those split ends!
Other than some split ends from rough brushing, my hair is looking great! It's clean and soft, and not at all what you'd expect hair that hasn't been washed in 10 days to look like!
****************************************
Today is Friday (Day 12), and I'm very happy with my hair today! I used a honey mask last night to try to smooth my split ends and moisturize my hair, but it was a little different than I normally use. Rather than slather on honey alone, I added a little bit of hot water (just enough to thin out the consistency a tiny bit; I didn't measure, but if I had to guess a ratio I'd say 1 part water to 2 or 3 parts honey), a dollop of Greek yogurt (for protein), and a few drops of extra virgin olive oil (to soothe those split ends). I was VERY careful not to add too much oil though! I once had a bad experience with an olive oil hair mask; I looked like a grease ball for a whole day! I put all of the ingredients into a jar with a lid and shook, shook, shook! It really doesn't take much shaking to mix together though.
I left this mask on for 2 hours (I probably would have left it on longer, but it was getting too late), and rinsed very thoroughly with warm water. I followed that up with 2 apple cider vinegar rinses (one would've sufficed, I'm sure. I was just paranoid about my hair looking too oily).
My homemade honey mask/shampoo!
A little goes a long way.

Moisturizing Honey Mask/Wash for Split Ends:

  • about 1/8 RAW honey*
  • dollop of PLAIN Greek yogurt
  • 2-3 drops of extra virgin olive oil
  • water, just enough to thin out the consistency
*1/8 cup of honey is an estimate. Use more or less depending on how long/thick your hair is.

Mix ingredients in a jar or container with a lid by shaking or stirring. Apply to wet hair, massaging into the scalp. (I did this part standing in the shower. This mask is thinner than what I normally use, so it drips quite a bit.) Leave in for as long as you can (at least 30 minutes!), and rinse thoroughly with warm water (not too hot, because the heat can make split ends worse). Follow with an apple cider vinegar rinse (1 part ACV: 3 or 4 parts water). Allow hair to air dry.
It's important to note that this is a pretty messy treatment, so a little bit goes a long way. It's definitely necessary to use a shower cap or wrap your hair up with an old, clean t-shirt (that's what I used). Try to remember there is no other way to fix split ends other than cutting them off. This is simply meant to be a temporary fix until you're able to get a trim.


Wow, look at that difference! You can still see some split ends, but most of them are tamed for now.
I mentioned that I was worried about the extra virgin olive oil leaving my hair greasy, but it didn't at all! In fact, I think I'm going to incorporate this new mask into my routine about once a month.

Breakdown of my no poo week:

  • Day 9 (Tuesday) - 3 days since last honey wash. Hair is still soft and smells nice, but there's a bit of oil at the roots.
  • Day 10 (Wednesday) - "Washed" with my apple cider vinegar rinse, air dried, and finger combed. I noticed a lot of split ends.
  • Day 11 (Thursday) - Moisturizing honey mask to smooth split ends. Worked very well, without leaving hair oily!
  • Day 12 (Friday) - Another good hair day! My split ends are tamed for now, and my hair feels wonderful!
  • Day 12 (Saturday) - My hair looks and feels great, but I did notice a couple of pimples in my scalp. I'll definitely keep an eye on that.
  • Day 13 (Sunday) - I'm not sure what caused the pimples, but one honey mask (with some yogurt and lemon) took care of them.
  • Day 14 (Monday) - Today is a good hair day, other than feeling like I need a haircut. My short, layered 'do is in need of an update.

Unexpected benefits of no poo:

  • When I used commercial shampoos, before making the switch, I shed A LOT of hair. I usually noticed it most in the shower; after shampooing my hands would be covered in hair! Sadly I came to accept this as the norm. However, last night in the shower there were maybe 2 strands of hair on my fingers after my apple cider vinegar rinse! That's the first time since I was a teen that I haven't shed a handful of hair after a wash!
  • Little did I know that honey contains an enzyme (glucose oxidase) that produces hydrogen peroxide. Does anybody know what hydrogen peroxide does to hair? Yep, it lightens it! Seriously, what can't honey do?! I feel like my greys have become less noticeable because of this, but they may just be all in my head (ha-ha, get it?). Even if that isn't the case, I've noticed the rest of my hair turning a lovely red that I'm really digging.
    For more info on lightening hair with honey and other natural alternatives, check out this blog post From Living the Nourished Life: How to Naturally Lighten Hair
11/16/14: After 2nd honey mask
11/21/14: After 3rd honey mask
I know that seems like a big difference for one mask, because I thought so too. It turns out that the enzyme in honey that produces hydrogen peroxide increases by a factor of up to 50,000 when diluted with water (Source: Honey can be Used for a Variety of Medicinal Purposes). So basically it lightens a lot better when mixed with water, and that's exactly what I did with my moisturizing honey mask!


Stay tuned for Week 3, which will include some ideas for "transition hair," and what to do when your hair looks to oily to wear down. Also, please feel free to comment with questions, suggestions, or even your own no poo story!


Honey, Yogurt, and Lemon Face Mask

I usually make my own Greek yogurt, but sometimes I feel lazy.

As you may or may not know, I LOVE honey - almost as much as I love DIY, all-natural beauty products! Well, this post combines my two loves!

For a long time I used commercial acne products on my face, with little improvement. The only time I quit using them is while I was pregnant with my son 6 years ago. Most skin care products contain salicylic acid, a mild acid used to treat acne and other skin disorders, which is actually advised against during pregnancy. The reason doctors caution pregnant women against using salicylic acid is that high doses taken orally have been shown to cause birth defects and various pregnancy complications (Source: Safe Skin Care During Pregnancy). It never occurred to me back then to search for a safer alternative; I just dropped the face wash from my shower routine. Thankfully, my pregnancy acne never got too bad.

Before I started on my journey to be toxin-free, I actually tried this DIY honey, yogurt, and lemon facemask because I ran out of my old commercial one and didn't feel like shelling out $5 for a new bottle. Other than being toxin-free, what better reason is there to try an all-natural alternative than saving money?

The original inspiration for this mask comes from Alyssa & Carla, however I did tweak it a bit: Greek Yogurt Mask.

This recipe is so easy, it only calls for 3 ingredients: honey, Greek yogurt, and lemon juice! Fortunately, I usually have these three things on hand (I actually make my own Greek yogurt!), so when I came across it on Pinterest I had to give it a try.

First let's discuss the benefits of these ingredients, and why they're good for fighting acne:

  • Honey - honey is an antiseptic, therefore it prevents the growth of the bacteria in your pores, and disinfects your skin. In fact, if honey is applied to a fully developed pimple or whitehead, it can stop the infection in your pore from worsening (Source: Honey and Acne). Honey also has anti-inflammatory properties, which reduce swelling and redness that can accompany pimples. Finally, honey is a humectant which preserves the moisture in your skin and draws moisture from the air, which leaves your face moisturized without feeling oily.
  • Greek Yogurt - the lactic acid in Greek yogurt helps to exfoliate and the fat moisturizes (which makes it great for dry skin). The yogurt itself acts as a very mild bleach, making it good for evening out complexion and calming skin.
  • Lemon Juice - Lemon also helps to lighten the skin and even complexion, while the citric acid exfoliates. Since lemon juice is an astringent, it also dries the blemish. *Since it can be drying, it's important not to add too much lemon juice, especially if you have dry skin.*
After trying out the original, and adjusting it to my preference, I found that I preferred to add a bit more honey to help reduce redness more and fight bacteria better.

Honey, Yogurt, and Lemon Face Mask:

  • 1/8 cup RAW honey (very important that it's raw, and not processed with corn syrup or any other fillers)
  • 1/8 cup PLAIN Greek yogurt (must be plain, with no added sweeteners)
  • splash of lemon juice (less or none for dry skin)
Combine ingredients in a small container, mixing thoroughly. Apply mask to clean face with hands or clean foundation brush. Allow mask to dry (about 20 minutes, depending how thick you apply it), then wash face with a wet washcloth (or clean hands) and pat dry. Store leftovers in the fridge (or eat it, because it's completely edible!). This face mask is gentle enough to use more often then commercial ones, but I'd still try to limit it to 3 or 4 times a week.

After I use this face mask I apply a homemade toner of diluted apple cider vinegar (the same one I use to rinse my hair, about 1 part ACV to 3 or 4 parts water), although that is completely up to you. It is perfectly safe to use a toner after a face mask; in fact, it tightens the pores! I usually just hop in the shower to wash the mask off, follow up with my ACV toner, and then rinse my face with cool water.

A foundation brush can help apply an even layer of face mask.

The great thing about this recipe is that all of the ingredients are edible, so you know that it's safe to put on your skin! You can play with the recipe to find something that suits you better, if you'd like. This could also make a wonderful gift for the holidays! (Just be sure to remind the recipient to keep refrigerated!)

I've had someone mention concerns about the lemon juice stinging their face, but I can assure you that I've had no trouble with this. However, every skin type is unique. As I mentioned before, lemon juice is an astringent so it has a drying affect. If you have dry or sensitive skin, you may want to leave the lemon juice out.
 
Some people have mentioned having an adverse reaction to honey and/or lemon juice, so be sure to test this recipe (as well as any other) on the inside of your wrist. If you feel any stinging or burning, wash it off immediately and DO NOT use it on your face.