Monday, March 30, 2015

Minimize the Mess Part 3


Welcome to the third post in the Minimize the Mess series! Since the last post I've taken two more carloads of things to Goodwill. Now that I've donated about a quarter of our unused and unneeded things, I finally feel ready to start selling some of it! Before purging 25% of the junk, the thought of dealing with eBay, Craigslist, and local buy/sell Facebook groups (as well as having everything just taking up space until it sold) nearly gave me a panic attack! I don't know if you've ever tried to sell things online, but sometimes buyers can just be... well, hostile is the nicest term I can think of.

How/where have I been selling things?


  • Resale/Consignment Shops - My first choice when selling things is to take them to local resale shops. My favorite place to sell my son's old clothes, toys, and baby gear (yes, I still have some 5 years later) is a local used children's clothing and toy store. They buy recent styles at a percentage of what they're worth and resell them. I don't get as much as I would selling them online, but it's easier than waiting for someone to come to my house, and change their mind or try to (aggressively) haggle me down. They make an offer, and I accept or don't - it's that simple. 
  • Facebook Buy/Sell Groups - I know I didn't make the local buy/sell groups sound like much fun, but it's definitely easier than dealing with eBay. I post pictures with descriptions and prices of the items, and arrange to meet the buyer somewhere locally. However, after a few times of wasting gas because of no-shows, I decided to just have people come to my apartment complex to look at the items. Because it's all local, I don't have to deal with any postage, shipping, or returns and refunds. If they don't like the item after seeing it in person, they just don't buy it. 
  • eBay - eBay is my last choice for selling things, because it's tedious. You have to list every detail about the item, there are seller fees, and it's a pain to deal with refunds and returns if the buyer isn't happy. 


How Much have I Made?

Items Sold
$$ Earned
Baby Items
& Toys
$96
Clothes
$2
Electronics
$15
Misc. Items
$13
Total
$126

Although we've made more than $100 selling things, my fear that things will be sitting around for a long time until they're sold is coming true! Since the whole point of this is to get rid of things, I've actually started giving things away for free and donating them. Any money we make is really just a bonus.

These piles of things waiting to be sold are about
to turn into things that are getting donated. 


The Decluttering Continues

I mentioned already we've taken 2 more carloads to Goodwill, making 3 in total. My family may not have been completely on board at first, but they've definitely come around now that we're making some money out of it. In fact, here is a picture of my son helping by picking out toys that he doesn't play with anymore!

What a great helper!


Kitchen Items 

I mentioned in Part One of Minimize the Mess that I had donated all but two (per person) of all the plates, cups, and silverware. I've trimmed it down a bit more since then by being rid of all my son's plastic plates and utensils. At five years old, he's already proved that he's responsible enough to eat off of glass plates. You'd be surprised by how much space that has cleared up.

There is still one cabinet that annoys me when I look at it though. The dreaded Tupperware/container cabinet! Those lids are a pain to contain (mind the pun). I'm seriously considering switching to mason jars, since I already have them.


Closets

In the past, our closets have been a place for hiding clutter. Can't find a place for it? Just shove it in the closet. I've actually stumbled across items that I thought were long-lost, or that I'd just completely forgotten about. That got me to thinking: how could I be hanging on to all these things without even remembering what all I had? If everything is important, than is anything really important?

In the process of cleaning out my closet, I found a lot of old baby items and maternity shirts. I remember thinking at the time that I'll need them if I have another baby. Well, 4 years later and still no baby! It wasn't even hard to get rid of these items.


Among the baby things in the closet, I also found some old baby clothes that I'd set aside because I wanted to make a quilt out of them. Again, 4 years have gone by and I'm still no better at sewing than I was when I put these in the closet. I decided to find somebody to make the quilt for me, or just donate or sell the clothes.

Now I have this, rather than a bag of onesies.
Thanks, Quilts By Donna!


There is plenty more to be decluttered, and who knows if I'll ever really be done. As my journey continues, my perspective on what's really important changes; I'm starting to value experiences over items, and I'm okay with that.

Tuesday, March 3, 2015

Going No Poo - 4 Months


So I've been a bit behind on my blog posts again. I'm not going to beat myself up about it though, because I managed to stay on top of my schoolwork, declutter a ton of stuff, and even start a new hobby (brewing kombucha)!


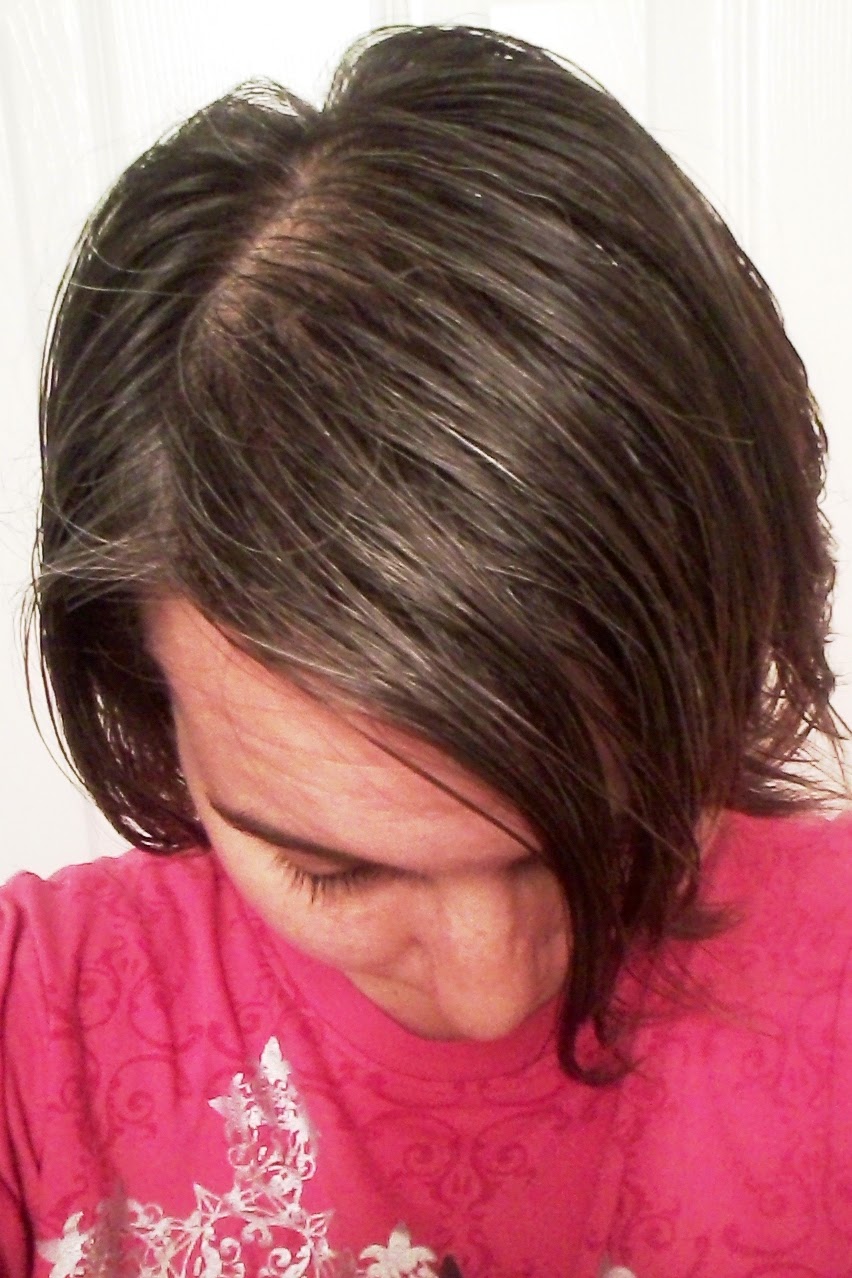
No Poo Haircut


I finally got another haircut, making it my second one since going no poo. I had the same stylist, and she was still super supportive of my crunchy antics. I was definitely due for one though. You can see in the picture above, it was getting a bit wild.


Experiment, Experiment, Experiment!

One thing I've learned throughout this journey is to experiment! I seriously cannot say it enough. After being acid only (AO) for the last 3 months, I decided to switch it up a bit. I felt like my hair was getting weighed down again (similar to what I was experiencing before switching from honey to AO). I swear my hair just does not want to settle into a routine.

I knew I wanted to try some sort of sebum removing wash, because I suspected my hair was heavy due to buildup (most likely from sebum). It also needed to be something I had on hand, because I refuse to order something special unless I absolutely must. It came down to baking soda and egg. Egg seemed like the gentler and easier option, so I went with that.


Egg Wash


For my egg wash, I simply beat a whole egg with an 1/8 teaspoon of coconut oil. I applied it in the shower, left it on for the rest of my shower routine (about 5 minutes), rinsed with cold water (hot water will cook the egg, and it will be hard to get out), and finally a diluted apple cider vinegar (ACV) rinse. The egg wash is the most sebum removing wash I've done since switching from commercial shampoo, so in hindsight a teaspoon of coconut oil probably would've been better. I only left the egg in for five minutes to avoid any smell issues; I also rinsed with ACV for the same reason.

You can see the difference the egg wash made in the picture above. Look at that lift and body! I sort of wish I'd done the egg wash before my haircut, but oh well. In my first ever post about giving up shampoo, Going No Poo - Week 1, I mentioned egg washes as one alternative to shampoo. While egg is great at cleansing and removing sebum, it can lead to protein overload if used more than once a month (the white or the yolk can be used weekly though). I'll probably try doing my egg wash bimonthly and see if I need to increase frequency from there. If I can push it even farther, that's even better!


What's Next?

Since I've been brewing my own kombucha, I plan on trying a kombucha rinse soon! I'll write about it next month and let y'all know how it worked.


To read about the rest of my journey, click here:

Monday, February 16, 2015

DIY Cinnamon & Clove Mouthwash


I finally cut all of the yucky commercial products out of my oral care routine! I gave up toothpaste 3 months ago and opted to brush with coconut oil instead, because of its awesome benefits (antibacterial, antifungal, and antimicrobial to name a few) (Source: Treatment of Dermal Infections With Topical Coconut Oil). I've also started oil pulling with coconut oil most mornings as well. (For more information about oil pulling, check out this article.)

I haven't used mouthwash in quite some time, but I did miss that squeaky clean feeling it gives me. After receiving a HUGE bottle of vodka for Christmas (to add to the already large bottle sitting on top of my fridge), I decided to search for ways to use it, other than drinking it. Let's face it... I'm not much of a drinker, so it's basically a lifetime supply for me.

After reading a lot of different recipes, I learned about the different herbs and their benefits. There are so many different combinations of herbs that can be used for mouthwash, but I used ingredients that I had on hand and are easily accessible (in my opinion). Easily accessible, to me, means that you can find it at the grocery store, and you don't need to do any running around or special ordering.

My oral care routine:
homemade toothpaste (coconut oil & clove)
& cinnamon/clove mouthwash


DIY Mouthwash Recipe


Directions


  1. Add 1 cup of water and the cinnamon stick to a small pot and bring to a boil. As the water heats up, prepare the the rest of the herbs by placing them in a measuring glass or mason jar (it must be a glass container).
  2. After the water comes to a rolling boil, pour it and the cinnamon stick into the glass with the herbs and allow it to steep for 5 minutes. 
  3. When the herbs are done steeping, strain the miture into a mason jar (or whatever glass container you'll be storing your mouthwash in) using a coffee filter. Add the last 1/2 cup of water and the vodka. Allow to cool completely before using.


The Finished Product

I was pleasantly surprised by the cinnamon/clove flavor, and I thought they complimented each other quite nicely. It even reminded me of a toned-downed version of Crest's cinnamon mouthwash! If you prefer a stronger flavor, simply leave the extra 1/2 cup of water out next time. If you need a sweeter flavor, try adding some honey or stevia. The beauty of this recipe is that there's room to play with it, depending on what herbs you have and the results you desire!

Obviously this mouthwash isn't kid-friendly because of the vodka, but if you wanted to make one for children you could easily leave that out. If you have fresh mint, you could also try using that in place of the cinnamon for a minty flavor. I plan on trying this soon!


Helpful Resources

This mouthwash wasn't adapted from one recipe in particular. I actually put this recipe together myself after a lot of research on the subject of homemade mouthwash. Here are some of the sources that were most helpful:


Wednesday, February 11, 2015

Minimize the Mess Part 2


Since the first Minimize the Mess post, I've been doing a lot more purging and decluttering and it feels great! I took a full carload of stuff to Goodwill yesterday, and as soon as it was gone I felt like a weight had been lifted off my chest.

When I first started this journey, everybody in the family was not completely on board. My 5 year old son was the easiest to convince since his room was so nice and neat after the original purge. I also told him he could keep a percentage of the money from whatever we sold, so I think that helped. My significant other was a little more resistant, but after seeing what's been accomplished he's coming around.

Some of the projects I've been working on since the last post:


Transferring all of the DVDs we own into a CD/DVD  Binder:

Sadly, the DVDs shown are only a fraction of the ones we own. We actually had to buy a special binder that has over 200 slots for CDs/DVDs. The small, black one pictured is now holding my 5 year old son's DVDs. This alone freed up a whole shelf on our bookshelf.
This is all almost all of the cases I threw away.

Creating digital copies of the recipes I use in my cookbooks:

Screenshot of my progress so far.
In my last Minimize the Mess post, I talked about scanning my son's artwork and keeping it digitally, rather than piles of paper sitting around the house. Well, it's the same concept for the cookbooks. I love cooking, so I get a lot of cookbooks as presents. While I greatly appreciate it, and even enjoy some of the recipes I come across, I don't enjoy having to search through 10 different cookbooks to find the recipe I'm looking for. I'm hoping to empty out another shelf on the bookshelf with this project, because I have plans for it after it's empty. I plan on converting these recipes to PDF files so that I can print them out if I wish to. 

Condensing my wardrobe and the laundry in general:

Less clothes = less laundry. Like the dishes in the last Minimalism post, I recently realized I have too many clothes. Do you know how I figured it out? The clean clothes pile became so overwhelming, that I dreaded hanging them up. I'm going by the "60 day rule" on this one, meaning that if I haven't warn it in 60 days it gets donated. We also have too many towels, for some reason. I'd like to get it down to 2 towels per person. 

Transferring the board games into gallon storage bags:

This was perhaps my favorite of the projects I accomplished. I freed up a shelf on the wall, and put a stop to the board game box eyesore! For this project, I simply cut out the cover of the board game and put them in a gallon size storage bags with zip tops, along with the board itself and all of the pieces. Some of the box covers needed to be trimmed down a bit to fit into the bag. All but one of the boards were small enough to fit into the bag, so I'm thinking about just replacing it with a travel-size version.

I was inspired by a pin on Pinterest for this project. Check it out here, if you like.

Decluttering & Purging the Spice Cabinet:

After throwing away what was expired, and giving away the doubles and spices we hadn't used in the last few months, I was left with a better organized and easily accessible spice cabinet. This will probably be something that I do every month.


One item in, one item out

Since we seem to be accumulating so many things without ever getting rid of anything (until recently), I decided to start employing this popular rule in the minimalist community: for every item you bring into the house, one has to leave. For example, if you get a new shirt you have to donate one. This small step should help keep things from getting to cluttered in the future.


This is still an ongoing process, and the apartment is nowhere near how I'd like it to look yet, but every box donated is one step closer!

Tuesday, February 3, 2015

Going No Poo - Week 12 (& Herbal Hibiscus Rinse)


In the spirit of minimalism, I've decided to minimize my stress and workload by making the Going No Poo series a monthly post rather than a weekly one. To be honest my scalp is so normalized that there isn't really anything new going on.

One of my main goals when starting this blog was to help others feel beautiful naturally, without having to conform to societies mainstream notion of what beauty is. I can honestly say that after three months without commercial shampoo, my perspective on hair has changed quite a bit. For example, my hair looked somewhat oily yesterday, and rather than think it was "gross," I thought: "my hair is softer than the the softest puppy I've ever felt!" Yes, that was my exact thought. I hope this blog inspires even one other person to feel the same way, rather than worry about what everybody else will think.

My monthly No Poo progress.
Check out those natural waves happening!

One thing that I have noticed is that my hair does not like to settle into a routine. As soon as I find something that works wonderfully, my hair decides it's time to switch it up. For the last few weeks, I've been alternating between an apple cider vinegar rinse and a coffee/herbal tea rinse. I've finally gotten my tea rinse to the perfect ratios (for me), so here it is:

Herbal Hibiscus Rinse


For my herbal tea rinse, I simply mix all of the ingredients together and pour it over my head. Applying this rinse over the sink (onto dry hair*) is the easiest method for me. I put a large mixing bowl in the sink to catch most of what I pour over my head, that way a little rinse goes a long way.

I also add a drizzle of honey occasionally (about a teaspoon), particularly if any irritation pops up (like during the winter months).

*I apply the mixture to dry hair, rather than wet, because of hard water issues. 

For the Hibiscus Tea:

I boiled 2 hibiscus tea bags in 1 cup of water for 5 minutes, and then let it steep for about 30 more minutes. Mine reduced to a 1/2 cup by the time all the boiling/steeping was done, but you can save the leftovers in the fridge if you wind up with more than half a cup.

For the Rosemary/Ginger Tea:

I boiled a fresh piece of ginger (about an inch long), 2 tablespoons of dried rosemary, and a teaspoon of ground turmeric in about 2 cups of water for 5 minutes, and then let it steep for 30 minutes. Since this herbal tea has loose herbs, it's best to strain with a coffee filter before using. As with the hibiscus tea, you can store the leftovers in the fridge.

Strongly brewed coffee can be used in place of espresso. 


Behold my healthy scalp, free of irritation and/or dandruff!


To read about the rest of my journey, click here:

Monday, January 26, 2015

Minimize the Mess


I've been a bit out of sorts lately. I've been behind on my school work, and on my blog posts! It took me a while to figure out it was ugly house syndrome. Have you ever experienced it? Sometimes an untidy or unorganized home can leave one feeling a bit sluggish, or even depressed. In my case, we have a tiny apartment yet we've accumulated a lot of stuff junk. So much, in fact, that some of it was just sitting in boxes, taking up our living room! What is the point in having so much stuff, if it just becomes an eyesore that doesn't even get used?

min·i·mal·ism

What is minimalism? The basic concept is "less is more!" We live in a consumer-driven society, and many of us (myself included) feel obligated to buy something just because it's cheap or on sale. There is a lot of confusion between needs and wants these days. For example, do we need 20 plates in a three-person family? Does my significant other need that new Nerf gun to add to his already huge collection? Does my son need that new toy he sees in the store? No, no, and no! Those are all wants.

While this journey is still ongoing, it all started when I discovered a minimalist group on Facebook. I was so inspired by everybody's posts and beautiful photos that I immediately began sorting through our "stuff" to determine what was a need and what was a want.


Make a Plan

The first thing I did was take a look at the apartment and determine the "catch-all" areas and problem spots. In my household, these included the kitchen table, the coffee table, and the kitchen counters... basically any flat surface. One of the worst spots in the house, other than those already mentioned, was my 5 year old son's room; therefore his room was the first to get "purged." Goodness, that kid has too many toys. So far it's the only room completely done, so I'll give y'all the breakdown of the plan for his room.

The Plan

  • Go through EVERYTHING!
  • Determine what needs to be purged. Has it been played with in the last 6 months? Are there multiples of the same item (3 Spiderman action figures, for example)?
  • Sort into 4 different categories: Sell, Donate, Trash, and Keep.
  • Don't get ahead of yourself and get rid of something you actually need. If there is something you're unsure about, try putting it in a "test box" that is out of sight. If you can make it a predetermined amount of time without using it, then get rid of the item. 
  • Don't expect to be done overnight. This is an ongoing journey for us, happening a little bit at a time. 


Purging 

No, I wasn't out on the one night a year that all crime is legal. Purging, in the minimalist community, refers to getting rid of all of the unused, unneeded things, so you can get down to the items you really need, love, and appreciate.

Before the purge, my son's room always looked like it had just been hit by a hurricane. It didn't matter if there were toy boxes, he dumped all of the toys on the floor. To escape the mess, he often dragged toys out into the living room to play with them, and that only lead to more clutter. He still has a lot of toys put up in the closet, but he now has no more than 20 toys in his room. Cleanup time is no problem for him now, as opposed to before. Does "I need help! I can't do it by myself!" sound familiar?

These are the toys purged from my son's room. Now imagine them spread all over the floor.

Other than my son's room, I've also gotten around to the never-ending dishes. After going through all of the plates, silverware, and cups, I've gotten it down to enough for five people. That's more than enough for a family of three, considering we use paper plates and utensils when we have guests and my son has his own kid-friendly dinnerware.

My current project is reducing a stack of my son's artwork (about a foot high) by scanning most of it, and only keeping hard copies of extremely special projects. Now we'll have all of it saved digitally, without the clutter of stacks of paper or a dozen three-ring-binders taking up space! You could save them to your computer or another device, but I saved them to Dropbox (download it here!). IT's a "cloud" type service, meaning I can access them from anywhere.

Screenshot of Dropbox. Click here to download it!


Benefits of Minimalism

  • Less stuff = less mess. Let's be honest... there are only so many ways to organize. Do I really want need 10 different boxes of toys taking up space in the closet? Rotating toys works for some families, but not this one. Same with the dishes I mentioned already. The more dishes there are, the more I have to wash. I can say, without a doubt, that cleanup (in the kitchen and my son's room) has been a breeze since.
  • Discovering what's really important. How can we truly appreciate what we have, when most of it is just taking up space? Going through everything gave me a chance to judge what was really meaningful, and what was just in the way. Going through artwork especially brought back some valuable memories and allowed me to reminisce about my son's younger days. 
  • It honestly just looks nicer. Although our home is not even close to being completely done, I know it will look more open and inviting than it did packed to the gills with stuff.


I will definitely keep y'all updated as this project goes on. I'll remember to take some "before" pictures for the next post as well!

Sunday, January 18, 2015

Double-Duty Orange-Infused Vinegar: Hair Rinse & Household Cleaner!


This post was originally inspired by a Facebook post (click here to see it).

I've mentioned before that I love double-duty DIY products! Reusing tea bags and leftover coffee for conditioning hair rinses, and old coffee grounds as a facial scrub are just some examples. Well, I was peeling a mandarin orange for my son one day and I thought, "These smell too delicious to just throw down the garbage disposal!" (Although, that is one way to repurpose orange peels and freshen up your disposal. Can you say "double-duty?") I then remembered that my mom had shared a post to my Facebook page about soaking orange peels in vinegar for 2 weeks to create your own orange-infused vinegar! I had everything I needed, so I went ahead and tried it.

Basic Concept:

The instructions for this project were quite simple: fill a jar with orange peels, cover the orange peels with vinegar, and let them soak for 2 weeks.

I actually made two different batches. I decided to add rosemary and a cinnamon stick to one jar, because of their benefits to hair. A week later, and one sniff, let me know that the cinnamon/rosemary one will only be for cleaning! The cinnamon smell was so strong I wouldn't even dream of trying it on my scalp. Some folks actually experience a burning sensation with cinnamon, so I didn't want to risk it - especially considering how strongly it smelled. Thankfully, I had made one normal batch that could still be used for my hair.


Straining the Vinegar:

Strain the vinegar before using it (trust me, the rosemary and orange peels will clog your spray bottle). Simply place a strainer over a bowl or measuring glass, and pour the orange-infused vinegar into the strainer. You may need a fork to get all of the orange pieces out. I suggest letting them sit for awhile so that the excess vinegar can drip down.

I only took pictures while straining the vinegar with the orange peels.


The final product is orange-colored.
Save the orange peels and use them again!


For Cleaning:

If you're using your orange-infused vinegar for cleaning, like the rosemary/cinnamon one I created, then you only need to dilute it to  50% with water. Mine smelled incredibly strong because I used a whole stick of cinnamon (too much, by the way), so my ratio was more like 3 parts water to 1 part vinegar. I seriously recommend using a very small amount of cinnamon or just leaving it out all together.  Nobody in my household was a big fan. However, it was pretty great at removing hard water stains.

Add it to a spray bottle or squirt bottle to make cleaning easier.


For Hair:

If you've read any of my Going No Poo post, you might know that I'm a big fan of using apple cider vinegar as a conditioner. This orange-infused vinegar (you can use white vinegar or ACV) can also be used on hair! Dilute it to your preferred vinegar rinse solution. If you're a first-timer, you should start with 1 or 2 tablespoons of the orange-infused vinegar per 1 cup of water. The orange peels are great at removing excess oil, so you definitely don't want to overdo and remove too much of your natural sebum.


After You're Done:

Don't toss those orange peels yet! You can use the same orange peels and repeat the process all over again! I've only reused them once so far, but I'll definitely try it again after the second batch is done.


My Experience:

I absolutely loved the orange-infused vinegar! The orange, rosemary, and cinnamon one... not so much. It came in handy when the newest fur baby in our house had an accident on the carpet though - it definitely covered up the urine smell. Adding the cinnamon was a fail, in my opinion, but there was no way I was going to let it go to waste.