Monday, December 29, 2014

DIY Coffee Facial Scrub!


In the post Going No Poo - Week 5, I discussed using a coffee rinse in my hair that turned out wonderfully! You may have noticed a picture of me with an espresso mask/scrub on my face that sort of looked like mud. Yep, here it is:


Well, it's not mud. I was inspired to try coffee grounds (or espresso, in my case) the same night that I tried my lustrous espresso rinse! If I can repurpose the extra coffee into a (basically) free, conditioning rinse, why not use the grounds too? I've come across a few mentions of using coffee grounds for a facial scrub on Pinterest and Facebook, and I happen to have some fresh grounds on hand last night after brewing some espresso (to drink and for my hair)... plus I love to experiment with free, DIY beauty treatment! *This Scrub can also be used on those pesky rough elbows and feet!*


What Ingredients Did I Use?


All it took was 3 simple ingredients, which are quite common in my household:
  • Coffee Grounds - I used espresso grounds for my scrub, but they are basically interchangeable for this purpose. You can use either fresh or used grounds, so why not get more bang for your buck, and reuse grounds you've already brewed? The coffee grounds work as an exfoliate, while the caffeine has anti-inflammatory properties that reduce redness and inflammation. It also temporarily reduces the appearance of cellulite! Who knew you could get cellulite on your face? Not me. (Source: LIVESTRONG.COM)
  • Honey - Some of you may know that I have a love-affair with honey, and that's okay with me. Honey is an antiseptic, therefore it prevents the growth of the bacteria in your pores, and disinfects your skin. In fact, if honey is applied to a fully developed pimple or whitehead, it can stop the infection in your pore from worsening (Source: Honey and Acne). Honey also has anti-inflammatory properties, which reduce swelling and redness that can accompany pimples. Finally, honey is a humectant which preserves the moisture in your skin and draws moisture from the air, which leaves your face moisturized without feeling oily.
  • Lemon Juice - Lemon helps to lighten the skin and even complexion, while the citric acid exfoliates. Since lemon juice is an astringent, it also dries the blemishes. *Since it can be drying, it's important not to add too much lemon juice, especially if you have dry skin.*
This may not be the prettiest mask in the world, but I personally love the smell!


Directions

I love the ease of this scrub! Simply mix together the ingredients in a small container, and apply to the face with clean hands or a clean makeup brush. Leave the scrub on your face for about 2 minutes, or longer if you like. Rinse over the sink or in the shower and gently rub the scrub off in circular motions . Pat your face dry with a clean towel.


You can easily make this scrub into a mask: simply add 1/2 Tbsp of Greek yogurt, and leave it on until it dries!


Some people have mentioned having an adverse reaction to honey and/or lemon juice, so be sure to test this recipe (as well as any other) on the inside of your wrist. If you feel any stinging or burning, wash it off immediately and DO NOT use it on your face.

Saturday, December 27, 2014

Going No Poo - Weeks 6 & 7


I've been pretty busy with the 7 Days of Christmas, so I was pretty late getting to Week 6. The week was already almost over by the time I got any free time, so I figured I'd just combine Weeks 6 & 7.


Giving Up Honey

I seriously LOVE honey. I love it! Have I said that enough yet? Despite my love-affair with honey, I actually haven't washed with it since Week 4 (well, maybe a drizzle in my rinses here and there). It doesn't mean that I don't love honey anymore (I swear, I do!), it was just time to switch things up! I felt like my hair was getting too weighted down, and I also felt like I could stretch out the days between washes a bit more. I decided to finally try out an espresso rinse in Week 5, and LOVED it!

Can you see the difference in body? The espresso enhances my curls as well!


I did use a honey mask after a failed experiment left me with some scalp irritation. Read Trial & Error below for more details.


What Am I Using Now?

Since I recently made some homemade yogurt, I had plenty of whey leftover (a byproduct of yogurt). I tried a whey rinse back before I made the switch to No Poo, and I loved it then. I had espresso, I had whey, and somehow they ended up together in my hair. It was awesome, and the smell was delicious! My favorite part was that it was the closest to a lather I've gotten since going No Poo! The whey has a bit of a thickness to it, and that's what sort of feels like it's lathering up. I've also been experimenting with adding a ginger/rosemary tea to the mix (simply ginger and rosemary boiled in water and steeped for about 20 minutes). I usually leave it in for a while, but it works pretty well as a quick rinse too. This is just a personal preference, but I like to apply the espresso/whey mixture over the kitchen sink, then wrap my hair in an old, clean T-shirt and allow it to dry before rinsing it out with water.

Acid rinses (like apple cider vinegar, certain teas, and coffee) are not technically washes; they're considered a conditioner, so you can use them daily if your hair responds well to it.


Since the Switch

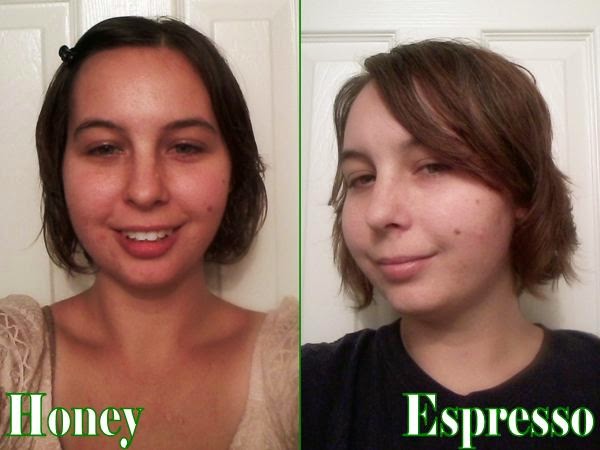
Since I've quit using a honey wash every week, and have switched to acid only (AO) rinses (espresso and whey, specifically), my hair has had so much more body! My hair loves espresso! I usually do them every other day, but they are fine to daily as well.


Trial & Error

One thing I sometimes miss about shampoo is the smell. My hair doesn't smell bad at all; it just doesn't have a smell. Sometimes I miss that freshly shampoo'd smell (think flowers or fruit), although not enough to actually use any. I decided to try a little scent experiment with vanilla extract. I don't have any EOs (essential oils, for you EO virgins like me), but I have seen vanilla extract in some DIY recipes (for lotion or soap perhaps). Well for those of you who don't know, most vanilla extracts are made with alcohol and sugar or corn syrup. Although alcohol is found in many commercial shampoos (why?), it's extremely drying. After going this long without commercial shampoo, even 10 drops of vanilla extract was enough to inflame the scalp irritation that going no poo helped get rid of. The irritation was bad enough for me to use a honey mask the next day, which helped immensely. Lesson learned: don't use vanilla extract on my hair.

Some people like to leave their conditioning rinses in, and I though it would be great to try with espresso! Wrong. It left brown marks on my hands anytime I ran my fingers through my hair. It also left my hair feeling a bit stiff... I'm not sure that's the right way to describe it, but I can't think of a better word for how my hair felt. I'm going to stick with rinsing the espresso out. 


Unexpected Benefits of Going No Poo


  • Stronger nails - since giving up shampoo I've noticed that my nails have gotten stronger, but especially since using my orange/rosemary herbal tea rinse on my hair; just the act of rubbing it into my scalp was enough to strengthen them. I wish I had a before and after picture to show you. My nails usually break off right above the pink, but in the last few weeks, they've gotten unbelievably strong! Since I don't use the herbal tea rinse anymore, I'd like to incorporate it into a nail care routine. 
  • New hair growth - believe it or not, those little hairs I circled below are actually new growth! I attribute it to the rosemary in the rinses I've been using (rosemary is great at strengthening hair and even promoting new growth), along with the fact that I haven't been using any harsh chemicals on my hair or scalp!
    I'm sure these little hairs are new growth and not breakage for a few reasons:
    1) I haven't been doing anything to cause split ends (tying my hair up, using harsh chemicals, brushing too hard and/or too often).
    2) I examined them to make sure there were no frayed or stressed ends. 

For more information on breakage and new growth, check out Hairfinder.com.


The most important thing I've learned from all of this is to experiment! Every wash or rinse you try won't work for you, but when you come across what does work for your hair you'll be over the moon. I thought I had found what worked for me with honey, but if I didn't experiment with new wash methods I wouldn't have found this better working one!


To read about the rest of my journey, click here: 

Wednesday, December 24, 2014

7 Days of Christmas: Day 7 - Cookies & Hot Chocolate for Santa (Bonus: Track Santa's Journey)


If you're in need of some easy last minute cookie recipes for Santa, look no further.

Peanut Butter Blossoms

While it's not the healthiest, one of my go-to recipes in the past were peanut butter blossoms. It was always a favorite, so I never rocked the boat by trying to tweak it or make it healthier. The peanut butter recipe was actually on a Jif peanut butter container (check it out here). For peanut butter blossoms, all you have to do is add a Hershey's Kiss immediately after taking them out of the oven.

Click here to get the recipe!


Cookie Bars

After reading some blog posts about how to use up Halloween candy back in October, I stumbled upon a cookie bar recipe that was actually from scratch! I love it because you can use whatever candy you have on hand (or pick red and green candies for Christmas!). This is the perfect recipe to use up any half full bags of chocolate chips or candy you might still have left over from Halloween (believe it or not, we do). Get the recipe here!

Click here to get the recipe!


Hot Chocolate Recipe

Sometimes Santa gets bored of plain old milk with his cookies... and by Santa, I mean me. Why not switch it up this year with an easy hot chocolate recipe? Don't forget the marshmallows! Try some of these easy and awesome recipes!


My son wants to leave out hot chocolate and eggnog, as well as a note asking which Santa prefers. That's totally fine with me, because Daddy likes eggnog and Mommy likes hot chocolate!


Track Santa's Journey!

Find out where Santa is right now with Google Santa Tracker! You and your children can see where he is, and what his next stop will be! Check it out here!


Happy Holidays to everybody! Don't get so wrapped up with everything that you forget to enjoy yourself!

Tuesday, December 23, 2014

7 Days of Christmas: Day 6 - Cheap, Last-Minute Christmas Gifts!


If you're like me, and you wait until the last minute to buy/make Christmas gifts, then these quick, cheap, and last-minute options will be right up your alley!


Homemade Teriyaki Sauce


Spoiler Alert for anybody we give gifts to: this is what you're getting this year. Hope you like Teriyaki! I can't remember where I got this recipe for the life of me, but it's extremely simple. What I love about this gift is that it's practically free. We up-cycled old lemonade bottles for the container, and we usually have all of the ingredients on hand. All I did for the label was print some business card size labels in Microsoft Publisher, punched a hole in each one, and tied them around the bottles with a ribbon.

Teriyaki Recipe

Ingredients
  • 1-2 teaspoons oil (for coating pan)
  • 1/2 teaspoon Ginger, grated (about 1/2 inch piece)
  • 1 tablespoon Garlic, minced (about 2-3 large cloves)
  • 1/2 cup Water
  • 1/2 cup Soy Sauce
  • 1/2 cup Brown Sugar
  • 1/2 teaspoon Red Pepper Flakes (I use 1/4 tsp.)
Directions
Heat the oil in a wok or saucepan on medium-high heat. Add the garlic and ginger to the pan first, immediately followed by the rest of the ingredients. Cook for 2 minutes and remove from heat. Use immediately, or allow the sauce to cool and put it in a container. 


Cookie Bars


These are even easier than regular cookies, in my opinion, making them perfect for the last minute. They're less time-consuming because you don't have to form individual cookies; just press the dough into a casserole dish and cut it into bars after it's baked and cooled. I originally used this recipe for leftover Halloween candy, but you can easily find Christmas colored candy to use (think red and green M&Ms or candy cane pieces).


DIY Ornaments


The baking soda ornaments may not be the quickest gift to make, but if you've already made them they're a breeze to handout as a last-minute gift. You may want to remember that for the years ahead: these homemade ornaments can be a day of fun with your family and presents!

The puzzle ornaments, on the other hand, can be made fairly quickly... about as long as it takes to put the puzzle pieces together, Mod Podge them, and let the dry.


DIY Beauty Products


Honey, Yogurt, & Lemon Face Mask


Back in November I posted a recipe for a honey, yogurt, and lemon face mask that makes a wonderful gift idea. Just be sure to remind the recipient that this mask needs to be refrigerated when not in use. Check it out here!


Herbal Tea Rinse


This is also a wonderful gift idea, because it can be customized for any hair type. You can make a blend specifically for hair loss, oily hair, or just a general use rinse! Check out the post here for different tea blends!


Monday, December 22, 2014

7 Days of Christmas: Day 5 - Kid-Friendly Christmas Tree Craft


This is a fun craft to do with kids of almost any age. Theses ice cream cones go perfectly with a ginger bread house, but they also make a great craft by themselves! They are perfect for little hands, and are much easier to assemble than a gingerbread house. As with many of the DIY projects I feature, this was inspired by a pin on Pinterest (check it out here).

What You Need


I forgot to picture the green food coloring. You can use a much
greater variety of candies, if you desire.

  • Sugar Cones (the pointy ones)
  • Vanilla or Cream Cheese Frosting (lighter colored frosting will be easier to turn green)
  • Green Food Coloring 
  • Assorted Candy (we used M&M's Pull-n-Peel Twizzlers, Gum Drops, & some spare candy from our gingerbread house kit)


Directions

  • Add green food coloring to frosting, 1 or 2 drops at a time, until desired green is achieved.
  • Place the Sugar Cones upside-down and frost them until they look somewhat like green trees. Young children may need help with this part.
  • Decorate your Christmas trees with candy!


Sunday, December 21, 2014

7 Days of Christmas: Day 4 - Santa Sack (& FREE Printout!)


What does Santa do with the presents he brings your children? In some households, like Daddy's when he was a kid, Santa didn't bother to wrap presents. I guess I can understand that. The big guy's pretty busy. Mine were always wrapped, usually in a different color, unless it was something awkward to wrap like a bike.

Well, another option is the Santa Sack! It's a special bag from the North Pole that Santa puts your child's presents in. I was browsing Pinterest a few weeks ago, when I can across the inspiration to create my own Santa Sack (check it out here).

It saves you the trouble of wrapping Santa's presents, if you do. Otherwise, it will add a magical touch to your child's Christmas morning.

The Santa Sack!


For this project, you'll need:


  • White T-Shirt Transfers
  • White Pillowcase (1 per child)
  • Iron


Directions

  1. Click here to print out the FREE Santa Sack printout! The text is mirrored in the printouts, but it will appear normal once you iron them on to the pillowcase. Be sure to print them on your transfers. You'll need 2 transfers for each Santa Sack you're making.
  2. Try to center the printouts onto the wrinkle-free pillowcase, image side down. Be sure to place the bottom transfer about 3 inches above the bottom of the pillowcase.
  3. Follow the directions that came with your White T-Shirt Transfers for transferring the images onto the pillowcase. 
  4. Gently peel off the transfer backing, holding down the transfer and the pillowcase, to reveal the finished product!
  5. Wait at least 24 hours before using the Santa Sack. Fill it with presents from Santa on Christmas Eve, and tie it with a ribbon!
The final product is now ready for Santa to deliver!

We used a king size pillowcase, but a standard will work just as well. We wanted to be sure there would be enough room, in case Santa brought something large.   


Saturday, December 20, 2014

7 Days of Christmas: Day 3 - Homemade Christmas Ornaments


Christmas is one of my favorite holidays!I try to teach my son that Christmas is not all about getting presents. Each year we even pick out a toy to donate to Toys For Tots! Since Christmas isn't all about receiving, we also like to make DIY presents to give away. Two years ago those DIY gifts included ornaments that we made ourselves!

These were fun to make, and even more fun to give away!
You only need 3 ingredients for these ornaments: baking soda, cornstarch, and water! I found the original inspiration for this project on Pinterest (what a surprise). Check it out here!

DIY Ornaments


Baking Soda Ornaments:


Ingredients:


  • 1 box of baking soda
  • 1 cup of cornstarch
  • 1 1/2 cups of water

What You'll Need:


  • Sauce Pan
  • Bowl
  • Spoon
  • Plastic Wrap
  • Cookie Cutters


Instructions:


  1. Mix all the ingredients in a saucepan and cook them over medium heat, stirring consistently, until it is too thick to stir with a spoon. 
  2. Cool for 15 minutes, or until the dough is cool to the touch. Knead it for about 5 minutes, or until smooth. Wrap dough in plastic wrap when not in use.
  3. Roll dough out to desired thickness (however thick you'd like your ornament to be), and use cookie cutters to cut dough into shapes. Don't forget the holes for string or hooks!
  4. Lay the ornaments flat to dry. This may take a few days (depending on how thick they are), so put them out of the way. The sunnier a spot it is, the better. Flip them over every day while they're drying to avoid raised edges.
You can paint them once they dry!


Recycled Puzzle Ornaments:

This actually an original idea, y'all! I love this DIY ornament idea because it involves upcycling, or using something that I otherwise would've thrown away. I found an old Power Rangers puzzle (ORIGINAL Power Rangers for those of you old enough to remember!) in Daddy's old mementos, but upon further inspection I realized some of the pieces were missing. I know, it's not that surprising considering it's a 20 year old puzzle. It meant too much to Daddy to just throw away, so I decided to try something out. These ones were for our personal use, and not given away.


I was actually inspired for this ornament by how a puzzle was packaged in Wal-Mart! They had puzzles on sale for Christmas, and they had an adorable little puzzle piece ornament attached to the outside of the box! I thought to myself, "I can do that!"

Of course their puzzle ornaments were only one piece, but mine didn't work out that way. There was no single piece with a picture on it that made any sense. I guess that's why you have to put the puzzle together...

I'm still super happy with mine though! I used Mod Podge (puzzle saving glue) to paint the peices and hold them together. I brushed both sides with Mod Podge, but make sure to let it dry before flipping it over. Otherwise you'll end up with newspaper stuck to your ornament, or Mod Podge stuck to your surface.