Sunday, December 14, 2014

Going No Poo - Week 5


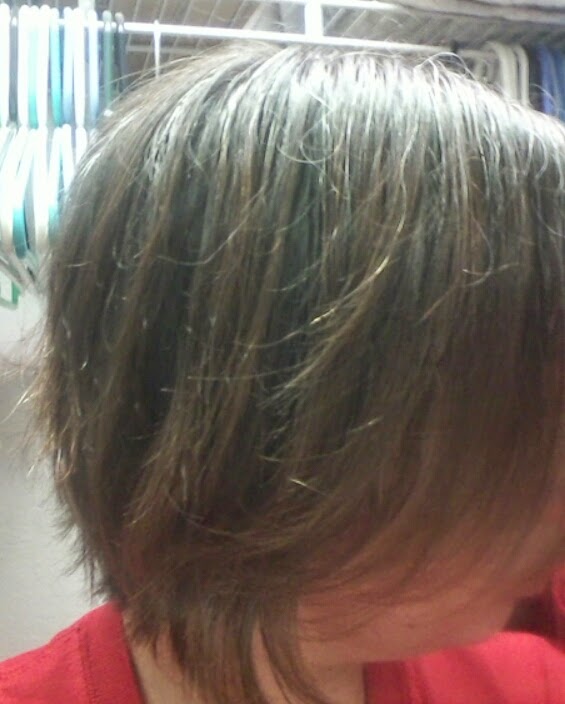
This week begins my 2nd month without commercial shampoo! Last week I promised that I would take a picture of my hair everyday, and I actually remembered! I "wash" with honey on Sundays and go the rest of the week with acid rinses (ACV, herbal tea rinses, and now coffee!), about every other day.


This week has had a lot of hair-firsts for me, so let's talk about those instead of the usual day-by-day routine! It's getting a bit repetitive since a routine has developed.

Remember, this is all still pretty new to me, and I'm by no means an expert. Every hair type is unique, so yours may not respond the same way mine has to these treatments.


First Haircut Since Going No Poo


I mentioned in Week 3 that I needed a trim, and was curious as to what my hairdresser would say about not shampooing anymore. Well, I finally got that trim, and it was probably one of the highlights of my week! I was very nervous about this appointment, because I was afraid they would think I was weird/dirty/crazy... in fact, I felt like I was going on a date! I had butterflies in my stomach, and I kept wondering, "what will she think?"

When it came time to wash my hair, I politely asked Ashley (we have the same name!) if she could simply wet my hair without shampooing it. She asked why, and I explained that I quit using shampoo a month ago and my reasons for doing so.  She completely surprised me by being awesome and supportive! She listened thoughtfully to what I had to say without judging, and actually told me she thought what I was doing is cool! Her only concern was whether or not honey is actually removing product buildup from my hair. She recommended using a acid such as lemon juice to remove buildup, and I let her know I rinse with apple cider vinegar (ACV). We then had a lovely discussion on how awesome ACV is, and she let me know that she uses it once a month!

A lot of folks in the group I belong to on Facebook have talked about how their hairdressers tell them their hair is severely damaged, or they just don't believe in not using shampoo. Some mentioned their stylist talking them into a shampoo while they were there and they regretted it. I can't advise anybody on what to do in this situation, only offer my own perspective. If my stylist would've insisted on a wash, I would have just left. I'm sure there are plenty of other places that will take my money even if I don't let them wash my hair, and I've worked too hard avoiding "full poo" products (other than some occasional hairspray). After hearing some of these stories, and even how some people feel forced to trim their own hair out of embarrassment, I feel extremely lucky to have found an awesome stylist that is supportive. I will definitely be going back to see Ashley again!


First Event Since Going No Poo

I really wish I had taken this before the party and not after.

Another highlight from this week is that I went to a Christmas party! You may be wondering how this is related to not using shampoo, but I promise it is! It was a big milestone in my no poo journey, because it was the first semi-formal event that I've gone too since giving up shampoo! I felt confident about my hair, and not at all self-conscious. I even took the opportunity to wear a dress!


First Espresso Rinse

Leftover espresso in my hair & used grounds on my face.
Needless to say, I smelled yummy!

I mentioned using coffee as a hair rinse in my post on Herbal Tea Rinses, and I finally got around to trying one! Most use coffee, but I only have an espresso machine. So don't fret if that's all you have as well. My favorite beauty/health treatments are the ones that don't cost any extra money, and this one fits the bill! I always end up with extra espresso in my carafe, and I know a lot of other people have the same problem with their coffee. Pouring it down the drain is such a waste! Why not use that leftover coffee/espresso as a conditioning hair rinse?

My Method/Experience:

I used the espresso while it was still lukewarm, with about a teaspoon of honey and a splash of lemon juice. Please be careful not to use the espresso while hot; it can cause serious burns! I applied it with a squirt bottle (think old, clean ketchup bottle) to dry hair (it's very DARK and messy, so I suggest standing over the tub or shower), massaged it into my scalp and through the length of my hair, and wrapped it in a clean T-shirt. Although you don't have to leave rinses in like a mask, I ended up leaving mine in for about an hour. This is perfectly okay - in fact, some people don't even rinse them out. (I may try it next time!)

I LOVED this rinse! Don't get me wrong, I love my apple cider vinegar (ACV) rinse too, but the espresso was a nice change of pace. First of all, OMG the SMELL!!! This might not be normal, but I totally wanted to eat my own hair. The smell faded after my hair dried, just like the ACV, but the smell in the meantime was divine! It also left my hair lustrous (shiny, not oily!), soft, and with more curls! I know that coffee is great for naturally highlighting dark hair, so I can't wait to see how it looks after a few more rinses!


This is my hair after the espresso rinse and air drying.
Look at those curls starting to happen on the sides!


First Time "Plopping"


A lot of girls in the No Poo group on Facebook have been talking about plopping. If you don't know what plopping is (I sure didn't), it's basically flipping your head upside down and wrapping your moist hair in a T-shirt to accentuate your natural curls. If you let your hair dry like that, then you should have nice, bouncy curls. Well, it didn't work so well for me. Maybe I didn't do it right, or maybe my hair is too short. Either way, I think my curls look more defined when I wrap my hair in a T-shirt the same way I do a towel.


Plopping
Just letting it dry wrapped in a T-shirt
(like a towel)

 For more detailed plopping instructions, click here.


A few important tips I've learned in the last 5 weeks:

  • Boar bristle brush (BBB) my hair before washing
  • Pour wash or rinse onto dry hair rather than wet
  • BBB dry hair only to avoid breakage and split ends
  • BBB hair from all directions (forwards, backwards, away from the part), making sure to flip hair over and BBB underneath as well
  • Stretch out washes longer with acid rinses (ACV, tea, coffee)
  • Experiment to find what works!


If you're curious about the rest of my journey, you can read about it here:

Sunday, December 7, 2014

Going No Poo - Week 4 (& How to Clean Your Boar Bristle Brush)


Wow, one month! When I first started this journey, I couldn't imagine getting to this point. Some people are still going through transition after 4 weeks, so I'm very grateful that I've had such a good no poo experience.


One Month In:

I was washing every 3-4 days, as needed, but my oil production has seriously slowed down. I've actually developed somewhat of a routine for my hair now! I mentioned last week that I'd like to only wash my hair once a week, and I got there sooner than expected! For the last 2 weeks, I've been able to stretch out my washes by 7 days! I didn't think to take a picture everyday until just now, but I will definitely do that for Week 5.

My "wash day" is on Sundays, and I'm able to get through the rest of the week by using my herbal tea rinse every other day (a mixture of oolong tea, apple cider vinegar, and herbs; read all about it here). I've also been applying my honey shampoo (or herbal tea rinse, if I'm not shampooing) to dry hair, since receiving a tip from a no poo peer. On days that I don't use honey or my herbal tea/ACV rinse, I do a water only wash (if I shower).

What has changed since Week 1:


Healthier Hair -

I'm happy to say that my scalp irritation has improved dramatically! I may notice a sore spot every few weeks, but they are completely cleared up after my honey masks. I've also noticed WAY less hair loss in the last month. I never realized how bad of a problem it actually was until I saw how much hair I WASN'T loosing in the shower. My hair is now naturally shiny (in a good, non-oily way!), softer, and easier to manage.

Money and Time -

I know I've saved money since giving up hair products (except for the occasional spritz of hairspray, although I plan on experimenting with a sea salt spray soon), but I honestly have no idea how much. I don't really know how long it took me to go through a bottle before the switch, but I can get a pretty good size jar of honey for $9 from a local beekeeper. There are no markings on the container (it's just a mason jar), but it looks to be about 12-16 ounces. On top of that I dilute it with water (about 1:1) and only use it once a week now, compared to commercial shampoo which was every at least every 3 days. I bought a brand new jar of honey at the beginning of November, and  it's still more than 3/4 of the way full after a month.

As for time, I brush my hair less often, wash my hair once a week, and spend less time worrying about an itchy, painful scalp!

I know I'm super lucky, because not everybody has the option of buying local, raw honey. That stuff can get pricey if you're buying it in health food stores or grocery stores, so honey may not be the best method for saving money if that's the case for you.


My routine for the last week:

  • Sunday - Honey wash/mask
  • Tuesday - Oolong tea/ACV rinse 
  • Thursday - Oolong tea/ACV rinse
  • Saturday - Oolong tea/ACV rinse

This week has been pretty uneventful, other than having some pretty great hair days.


Monday (Day 21)
Look at those curls starting to happen!
Sunday (Day 27)
Still looking good after a week!

Can you believe these two photos are a week apart, and that I didn't wash my hair at all in between?


How to Clean Your Boar Bristle Brush:

Last week I briefly discussed cleaning your boar bristle brush (BBB), but I'd like to give you a more thorough walk-through. I was cleaning 2 separate brushes at the same time while taking these pictures.


What you need:

Your brush, some old shampoo (or dish soap), and a towel.


Step 1:

Remove all of the hair from your brush (I might have forgotten to do this part first).


Step 2:

Wet the bristles.


Step 3:

Apply a small amount of old shampoo (or dish soap) to the bristles.

Step 4:

Scrub with your hands (or an old toothbrush).

Step 6:

Rinse the brush thoroughly, especially the bristles.

Step 5:

Lay the brush on a towel to dry, bristles down.
His & Hers

Step 6:

Allow the brush to dry.
I actually forgot about my brush drying and didn't check on it for 3 hours, but it was dry by then.

Some folks suggest soaking your brush in a bowl of water before scrubbing it, but others have told me this can damage the wood and/or bristles, leading you to have to replace your brush more often. This makes sense to me, because water can damage wood over time. I'll leave it up to you which method you prefer.


Click here to read about the rest of my journey:

Thursday, December 4, 2014

Herbal Tea Rinse: Customize It For Any Hair Type!


Here in the South, we LOVE our sweet tea! I'm from Florida, and tea is something that most people around here have on hand, so I decided to experiment with it. I love the idea of an herbal tea rinse, because it's double duty: you can make a drink and a hair rinse with the same set of tea bags! Since I was running low on my apple cider vinegar (ACV) rinse anyway, I decided it was the perfect time to try it! I've read a lot about how different teas can be used as acid rinses (sort of like ACV, which is an acid rinse). They can even be added to your ACV rinse; that's what I did! Adding herbs to your tea while it's brewing brings a little something extra to the table, depending which herbs you use.

Different herbs benefit different hair types, as do different teas (and coffee!), and that is what makes this tea rinse customizable: you can make it using the ideal tea and herbs for your hair type! I'll list some of the most common herbs and teas, and which hair type they benefit. First, I'll give you the rundown on the herbal tea that I made specifically for my hair: Herbal Oolong Tea Rinse.

My Herbal Tea Rinse:

For my herbal tea rinse, I brewed up some oolong tea that I happened to have sitting around since ordering Chinese takeout. I also threw in some mandarin orange peels and rosemary. I mixed the (cooled) herbal tea in with my diluted ACV rinse. However, I later learned that my hair prefers the tea diluted: about 1 part oolong tea to 3 parts water (read on for more details about diluting the tea).

If you prefer to get more bang for your buck, you can brew the tea bag per the normal directions for drinking. After your tea is brewed, remove the tea bag and boil it again for your hair rinse! If you're using this method, it may be best to brew the tea and orange peels/herbs separately (as I describe below) so that they don't interfere with the flavor of the tea. Although I have seen suggestions for brewing sweet tea with orange peels for a citrus flavor, so who knows!

But why did I choose these particular ingredients, and what are their benefits?

  • Oolong Tea - the high level of antioxidants in oolong tea prevents hair loss. Oolong tea also softens hair, while adding shine and luster.
  • Orange Peel - due to their anti-inflammatory properties, orange peels make a great dandruff remedy. Orange peels are also great for reducing oil. (They also smell great!)
  • Rosemary - it stimulates the follicles, causing hair to grow longer and stronger, and is believed to slow premature hair loss and the graying of hair (Source: Organic Facts). Ideal for dark hair.

The cookie is for eating while your tea is brewing!


Method/Results:

I brewed all three ingredients in 1 cup of water for about 5 minutes, and then allowed the tea to cool. After it was cool, I strained it (cheesecloth or a coffee filter may be required), and added it to my ACV rinse. However, the undiluted rinse left my hair stringy and greasy-looking after 2 days. That's unusual for me now; I can make it at least 4 days without looking too oily. I didn't want to give up this experiment after one little hiccup, so I decided to try diluting the oolong rinse I'd already made (my ratio was about 1 part oolong tea to 3 parts water), and that did the trick! I'm so glad I stuck with it!


I brewed orange peels and rosemary in water to dilute my
oolong tea with, since the undiluted tea left my hair oily.

After discovering that my hair preferred the tea rinse diluted, I decided to boil the orange peels and rosemary in water, and dilute the oolong tea with the orange/rosemary water. I did this so that the orange/rosemary smell wouldn't be weakened, but you can boil them all together if you find that easier. 

This time I boiled the orange peels and rosemary in 2 cups of water for about 10 minutes, allowed it to cool, and strained it. I steeped the oolong tea bag in 1 cup of boiling water for about 20 minutes (I actually lost track of time, but it was at least that long), and mixed it with the strained orange/rosemary water.

When I first tried this oolong tea/ACV rinse last week (read about it here: Going No Poo - Week 3), I loved the smell but had to do some more experimenting to figure it out. So remember: this no poo thing is NOT one-size-fits-all; experiment and figure out what works for you.

I want to clarify that this herbal tea is what works for me. Every individual is different, so my method may not work for the next person. I'm simply sharing my experiences as I go, and I'm in no way an expert.


Customize your tea with other options!


Teas:

  • Green Tea - (can be used on light or dark hair) prevents and treats dandruff and psoriasis, stimulates hair growth, softens hair, and adds luster (Source: STYLECRAZE)
  • Oolong Tea - (can be used on light or dark hair) prevents hair loss and shedding, softens hair, and adds shine and luster (Source: STYLECRAZE)
  • Black Tea - (dark hair only) increases hair thickness, fights hair loss and stimulates hair growth, darkens grays, and brings out natural highlights. It also adds shine, luster and natural darkness (Source: STYLECRAZE)
  • Coffee - (dark hair only) adds luster and more intensive tone to brown hair, stimulates hair growth, conditions, and adds natural shine (Source: STYLECRAZE)

 Herbs (by hair type & benefit):


All-Purpose:
  • basil
  • fennel seed
  • peppermint
  • rosemary
  • sage
Dark Hair:
  • cloves
  • rosemary
  • sage
Light Hair:
  • chamomile flowers
Revitalizing:
  • basil
  • ginger root
  • marjoram
  • peppermint
  • rosemary
Dry Hair:
  • burdock root
  • sage
Oily Hair:
  • lemon peel
  • orange peel
  • lemon grass
  • peppermint
  • rosemary
Auburn/Red Hair:
·         hibiscus

Conditioning:
  • burdock root
  • catnip
  • lemongrass
  • rosemary
There are many more herbs with benefits to different types of hair, however I only listed the most common. (Source: Frontier CO-OP)

Try creating your own unique herbal tea rinse! You can even experiment with different rinses to create more than one! For example: one for oily days and one to help with scalp irritation...

Please comment and share the herbal tea rinse you create!


Sunday, November 30, 2014

Pin It To Win It!

In order to celebrate my awesome readers (you guys!), I decided to have a Pinterest contest! Since I'm just getting started, and this prize is coming out of my own pocket, the prize is a $5 Wal-Mart eGift card - but an extra $5 never hurt!

I am not being sponsored or paid in anyway by Wal-Mart. This prize is coming out of my own pocket.

This contest is open to anybody with a Pinterest account and an email address! All you have to do to participate is follow Happy Modern Hippy on Pinterest, and comment on this Pin by answering the question “What is the first commercial beauty product (shampoo, makeup, hair dye, etc.) you’ll give up, or have already given up?” After that, all you have to do is share the pin! Complete all of this by January 31, 2015 and you'll be entered for a chance to win! The winner will be chosen at random by February 5, and the Wal-Mart eGift Card will be emailed by February 10, 2015.


http://www.pinterest.com/pin/304907837246627261/

Going No Poo - Week 3 (& Hairstyles for Transition!)


Wow, I can't believe I'm actually in my third week without shampoo! For those of you that have been following along on my no poo journey, thank you so much!

For those of you new to my no poo journey, check out Week 1 & Week 2!

Some of you may be wondering about the abbreviations I use sometimes, so I decided to make a short list of the ones I use most often:
  • WO = water only
  • ACV = apple cider vinegar
  • BBB = boar bristle brush
  • SMP = scritching (spelled with an "i"), massaging, & preening: very lightly making circular motions with the nails on the scalp, massaging the scalp with the pads of the fingers in a circular motion, and pulling the oil down the hair shaft with your fingers or palms.

It is officially Day 16 (Wednesday) since I've used commercial shampoo. It's been 3 days since my last honey mask/wash (with a dollop of yogurt and a splash of lemon juice), and my hair is still feeling great! It's been pretty consistent about getting oily at the roots around the third day after a wash, but a WO wash (and sometimes and ACV rinse) along with a BBB can help stretch washing another day or two.

Speaking of BBB, guess what I just found out: you have to wash your boar bristle brush! This makes sense to me, because the bristles are actually hair, and hair needs to be cleaned. Mine is recently bought, so thankfully I found out before it got yucky.

According to members in the no poo group that I belong to, how often you wash it is on an as-needed basis. So if you have oily hair (if you're going through transition, for example), you'll need to wash it more often than somebody with dry hair. I suppose it also depends on how often you brush your hair. I only use my BBB every few days, and use my fingers to brush the rest of the time. Some folks suggest once a week cleanings for your BBB, but if you don't brush that often (like me) then you'll be able to stretch out brush cleanings by a lot more.

Apparently they take a very long time to dry because the bristles are packed so closely together, so don't clean your brush if you have to be somewhere (with brushed hair) in 30 minutes.


Boar Bristle Brush
Image Source: Think Before You Buy

I'll go into more detail on how to clean your BBB next week, but here is the gist:
  • Remove all of the hair from your brush
  • Wet your brush, apply soap (or your old shampoo), and scrub with your hands or an old toothbrush
  • lay on a towel to dry, bristle side down
  • allow to dry before using (I'm not sure how long this takes yet)
 *****************************************
It's Day 17 (Thursday), and Thanksgiving! Care to guess what I'm thankful for this year (other than the best son in the world)? I'm thankful that my family is so understanding and supportive of my no poo journey! A lot of people who begin this journey get discouraged by family members, so I'm definitely counting myself lucky!

It's been 4 days since my last honey wash/mask, and my hair is pretty greasy! Up until now, I've been washing with honey if my hair gets this oily, but I'm going to try stretching it one more night with an ACV rinse. I'd like to get to the point where I only need to wash once a week, eventually.

 *****************************************

Friday (Day 18): before Oolong/ACV rinse


Today is Day 18 (Friday), and I'm pleasantly surprised by how good my hair is doing this long after a honey wash. As I already mentioned, the last 2 weeks my hair has gotten oily enough for me to wash it around 3 or 4 days after a wash. However, I decided to keep pushing past my usual wash day... basically just to see what happens. At worst, I figured I just wouldn't leave the house (thank goodness for the holiday break, and not having to go anywhere). I planned on doing an ACV rinse last night, but I never got around to it. I definitely couldn't get away with skipping the ACV rinse today, but I tried a few new things:
  • I only had a little bit of my ACV rinse left, and I've been wanting to experiment with tea rinses, so I brewed up some oolong tea with mandarin orange peels and rosemary to mix right in with my ACV solution. (I plan on going into more details in a separate post, so keep an eye out!)
  • Thanks to a tip from someone from the no poo group I belong to, I decided to try putting the rinse on my hair while it was dry rather than wet. The theory is that dry hair will absorb the conditioner better than wet hair; if your hair follicle is full of water already it won't absorb the conditioner as well. However, I couldn't find any reputable sources for this information or science to back it up. I did notice that I used a lot more of the rinse to saturate my hair than I would normally use on wet hair, so that is something to think about.
After using the oolong/ACV rinse, I immediately noticed that it had a much more pleasant smell than just plain ACV and water - almost minty. It faded as my hair dried, but it was still nice while it lasted. After that, my hair just smelled like clean hair. It was still looking oily at the roots, so I waited for it to air dry to BBB. It still looked just a bit oily at the roots, but a little SMP solved that problem.

 *****************************************

It's now Sunday (Day 20), and I once again didn't get around to rinsing my hair last night. I blame schoolwork, and Thanksgiving. My kitchen is still not fully recovered from all of that cooking! Anyhow, I can't believe it's been 7 days since any kind of wash (other than water or ACV). There is no doubt that my hair looks oily, but I'm honestly surprised that it doesn't look worse. I think my little experiment of seeing how long I can go without washing is over - I have to take my son to school tomorrow, so I'll definitely be doing a honey wash tonight!
 *****************************************


No Poo Week 3 Breakdown:

  • Day 15 (Tuesday) - 2 days since my last honey wash/mask, and my hair feels great still.
  • Day 16 (Wednesday) - My roots are a bit oily. 3 days since my last wash, so right on time. WO wash tonight.
  • Day 17 (Thursday) - Happy Thanksgiving! My hair is pretty greasy today, so I'm going to use an ACV rinse tonight.
  • Day 18 (Friday) - Skipped the ACV rinse last night, but tried a new rinse today: ACV and oolong tea. Love the smell! I'm very happy with the results after letting it air dry, BBB, and SMP. I'm probably going to use a honey mask tomorrow, but I'll play it by ear.
  • Day 19 (Saturday) - My hair feels wonderful, but looks pretty oily. Pretty good for not washing it with honey in 6 days, though! My dark roots are growing out, so the darkness on top only adds to the oily looks. A haircut that gets rid of my over-dyed ends should help considerably; only one more week until my trim! 
  • Day 20 (Sunday) - My hair is visibly oily, but it doesn't feel dirty or greasy. I can easily run my fingers through it, and it feels healthy and soft. I plan on doing a honey wash tonight.
 *****************************************

Tips for dealing with oily hair:

  • Try to touch your hair as little as possible. Oil from your hands will only make your hair look greasier.
  • Don't forget to BBB! Your boar bristle brush will really help move the oil down the hair shaft, helping your roots look less greasy.
  • When the BBB isn't quite cutting it, SMP (scritching, massaging, and preening) helps to loosen up sebum, dead skin cells, and product buildup. Massaging the scalp also provides some lift to your roots, giving your hair some of the body the BBB takes away. Make sure your hands are clean, so you're not just adding to the oil!
  • Sometimes you have no choice but to hide it. Read further for ideas!


How to hide an oily hair day:

Even though I didn't really go through a transition period (yet!), I realize everybody is not as lucky. That's why I decided to share some ideas for what to do with your hair when it's just too darn greasy to wear down!

The "bump" and the headband are my go-to solutions on greasy days.
What a difference it makes!


Short Hair

Unfortunately there aren't that many ways to hide your oily locks if they're short like mine, other than scarves, bandanas, or hats. Seriously Google "scarf hairstyle" or "scarf hairstyle short" and be amazed at all the possibilities! Wide headbands are your friend also.

Long Hair

  • French braids, if you're good at it
  • The side braid, also known as the Katniss or Elsa braid
  • There's always the obvious ponytail or bun
  • Scarves, bandanas, or hats if you're in a hurry


Double Duty Long Hairstyles

These options are great because they help hide oily hair and look like you spent an hour styling them! Oily hair is actually better for these styles, because dirty hair is just so much easier to work with than clean. Sounds wrong, but that's why people have to put product in their clean hair to hold a style. Here are a few somewhat easy options, that don't involve French braiding (goodness knows that I can't do it):

http://www.pinterest.com/pin/526569381403185703/
Source: http://www.pinterest.com/pin/526569381403185703/


Source: http://www.gurl.com/2014/03/25/easy-no-heat-hairstyles-for-dirty-hair-long-short/


Source: http://www.gurl.com/2014/03/25/easy-no-heat-hairstyles-for-dirty-hair-long-short/

      What are some of your go-to styles on dirty/oily days?


    Click here to read about the rest of my journey: 

    Friday, November 21, 2014

    Going No Poo - Week 2 (& Moisturizing Honey Mask for Split Ends)


    Welcome to Week 2 of my no poo journey! Last week I left off on Day 8 (Monday). If you haven't read about my first week going no poo, check out Week 1!

    So far so good this week, but it's still only Wednesday (Day 10). I've also been warned by fellow no poo peers (try saying that 10 times fast!) that sometimes "transition hair" doesn't kick in until Week 2 or 3! So now is the time to be wary... I'll keep y'all updated though.

    I'm still using the honey washes as my no poo method, although my last honey mask/wash was 4 days ago. My scalp and hair still feel good, and I feel like I could probably go 2 more days without washing with honey. The oil is sitting at my roots a bit, so I think I'll definitely need a water only wash tonight to help distribute that sebum (maybe even a apple cider vinegar rinse). I've noticed that the hair around my face gets oily first, probably from touching it and pushing it out of my face so much. I did get a tip from somebody in my Facebook group though: if my hair starts to get waxy (from a buildup of sebum, products, or hard water), an applesauce mask will help! They made sure to tell me that only sugar-free applesauce  will do (baby food or homemade would work also). Sugar can have a bad affect on the hair and scalp.

    I did notice some split ends where there is still color in my hair (I chopped as much off as I could 2 months ago, but there's still a bit of color on the ends). That means I will definitely need a trim soon, and I'm certainly interested in hearing what my stylist thinks about all of this.

    No funky smells either! My hair just smells like clean hair. Not the kind of perfume/flowery-clean that you may be used to, but there is definitely no stink.

    ****************************************

    It's Thursday (Day 11) now, and my hair is still looking great other than some split ends. I found out the hard way not to brush with a boar bristle brush while the hair is wet; apparently the hair is very weak while wet, and brushing with anything other than your fingers or a wide-tooth comb can stretch and tug hair leading to breakage and split ends. Lesson learned. Hopefully a honey mask tonight will help tame them until I get a trim in a couple of weeks. I'm also avoiding brushing as much as possible until then, using my fingers instead.
    After my ACV rinse last night (Day 10).
    It's clean, but look at those split ends!
    Other than some split ends from rough brushing, my hair is looking great! It's clean and soft, and not at all what you'd expect hair that hasn't been washed in 10 days to look like!
    ****************************************
    Today is Friday (Day 12), and I'm very happy with my hair today! I used a honey mask last night to try to smooth my split ends and moisturize my hair, but it was a little different than I normally use. Rather than slather on honey alone, I added a little bit of hot water (just enough to thin out the consistency a tiny bit; I didn't measure, but if I had to guess a ratio I'd say 1 part water to 2 or 3 parts honey), a dollop of Greek yogurt (for protein), and a few drops of extra virgin olive oil (to soothe those split ends). I was VERY careful not to add too much oil though! I once had a bad experience with an olive oil hair mask; I looked like a grease ball for a whole day! I put all of the ingredients into a jar with a lid and shook, shook, shook! It really doesn't take much shaking to mix together though.
    I left this mask on for 2 hours (I probably would have left it on longer, but it was getting too late), and rinsed very thoroughly with warm water. I followed that up with 2 apple cider vinegar rinses (one would've sufficed, I'm sure. I was just paranoid about my hair looking too oily).
    My homemade honey mask/shampoo!
    A little goes a long way.

    Moisturizing Honey Mask/Wash for Split Ends:

    • about 1/8 RAW honey*
    • dollop of PLAIN Greek yogurt
    • 2-3 drops of extra virgin olive oil
    • water, just enough to thin out the consistency
    *1/8 cup of honey is an estimate. Use more or less depending on how long/thick your hair is.

    Mix ingredients in a jar or container with a lid by shaking or stirring. Apply to wet hair, massaging into the scalp. (I did this part standing in the shower. This mask is thinner than what I normally use, so it drips quite a bit.) Leave in for as long as you can (at least 30 minutes!), and rinse thoroughly with warm water (not too hot, because the heat can make split ends worse). Follow with an apple cider vinegar rinse (1 part ACV: 3 or 4 parts water). Allow hair to air dry.
    It's important to note that this is a pretty messy treatment, so a little bit goes a long way. It's definitely necessary to use a shower cap or wrap your hair up with an old, clean t-shirt (that's what I used). Try to remember there is no other way to fix split ends other than cutting them off. This is simply meant to be a temporary fix until you're able to get a trim.

    
    Wow, look at that difference! You can still see some split ends, but most of them are tamed for now.
    I mentioned that I was worried about the extra virgin olive oil leaving my hair greasy, but it didn't at all! In fact, I think I'm going to incorporate this new mask into my routine about once a month.

    Breakdown of my no poo week:

    • Day 9 (Tuesday) - 3 days since last honey wash. Hair is still soft and smells nice, but there's a bit of oil at the roots.
    • Day 10 (Wednesday) - "Washed" with my apple cider vinegar rinse, air dried, and finger combed. I noticed a lot of split ends.
    • Day 11 (Thursday) - Moisturizing honey mask to smooth split ends. Worked very well, without leaving hair oily!
    • Day 12 (Friday) - Another good hair day! My split ends are tamed for now, and my hair feels wonderful!
    • Day 12 (Saturday) - My hair looks and feels great, but I did notice a couple of pimples in my scalp. I'll definitely keep an eye on that.
    • Day 13 (Sunday) - I'm not sure what caused the pimples, but one honey mask (with some yogurt and lemon) took care of them.
    • Day 14 (Monday) - Today is a good hair day, other than feeling like I need a haircut. My short, layered 'do is in need of an update.

    Unexpected benefits of no poo:

    • When I used commercial shampoos, before making the switch, I shed A LOT of hair. I usually noticed it most in the shower; after shampooing my hands would be covered in hair! Sadly I came to accept this as the norm. However, last night in the shower there were maybe 2 strands of hair on my fingers after my apple cider vinegar rinse! That's the first time since I was a teen that I haven't shed a handful of hair after a wash!
    • Little did I know that honey contains an enzyme (glucose oxidase) that produces hydrogen peroxide. Does anybody know what hydrogen peroxide does to hair? Yep, it lightens it! Seriously, what can't honey do?! I feel like my greys have become less noticeable because of this, but they may just be all in my head (ha-ha, get it?). Even if that isn't the case, I've noticed the rest of my hair turning a lovely red that I'm really digging.
      For more info on lightening hair with honey and other natural alternatives, check out this blog post From Living the Nourished Life: How to Naturally Lighten Hair
    11/16/14: After 2nd honey mask
    11/21/14: After 3rd honey mask
    I know that seems like a big difference for one mask, because I thought so too. It turns out that the enzyme in honey that produces hydrogen peroxide increases by a factor of up to 50,000 when diluted with water (Source: Honey can be Used for a Variety of Medicinal Purposes). So basically it lightens a lot better when mixed with water, and that's exactly what I did with my moisturizing honey mask!


    Stay tuned for Week 3, which will include some ideas for "transition hair," and what to do when your hair looks to oily to wear down. Also, please feel free to comment with questions, suggestions, or even your own no poo story!


    Honey, Yogurt, and Lemon Face Mask

    I usually make my own Greek yogurt, but sometimes I feel lazy.

    As you may or may not know, I LOVE honey - almost as much as I love DIY, all-natural beauty products! Well, this post combines my two loves!

    For a long time I used commercial acne products on my face, with little improvement. The only time I quit using them is while I was pregnant with my son 6 years ago. Most skin care products contain salicylic acid, a mild acid used to treat acne and other skin disorders, which is actually advised against during pregnancy. The reason doctors caution pregnant women against using salicylic acid is that high doses taken orally have been shown to cause birth defects and various pregnancy complications (Source: Safe Skin Care During Pregnancy). It never occurred to me back then to search for a safer alternative; I just dropped the face wash from my shower routine. Thankfully, my pregnancy acne never got too bad.

    Before I started on my journey to be toxin-free, I actually tried this DIY honey, yogurt, and lemon facemask because I ran out of my old commercial one and didn't feel like shelling out $5 for a new bottle. Other than being toxin-free, what better reason is there to try an all-natural alternative than saving money?

    The original inspiration for this mask comes from Alyssa & Carla, however I did tweak it a bit: Greek Yogurt Mask.

    This recipe is so easy, it only calls for 3 ingredients: honey, Greek yogurt, and lemon juice! Fortunately, I usually have these three things on hand (I actually make my own Greek yogurt!), so when I came across it on Pinterest I had to give it a try.

    First let's discuss the benefits of these ingredients, and why they're good for fighting acne:

    • Honey - honey is an antiseptic, therefore it prevents the growth of the bacteria in your pores, and disinfects your skin. In fact, if honey is applied to a fully developed pimple or whitehead, it can stop the infection in your pore from worsening (Source: Honey and Acne). Honey also has anti-inflammatory properties, which reduce swelling and redness that can accompany pimples. Finally, honey is a humectant which preserves the moisture in your skin and draws moisture from the air, which leaves your face moisturized without feeling oily.
    • Greek Yogurt - the lactic acid in Greek yogurt helps to exfoliate and the fat moisturizes (which makes it great for dry skin). The yogurt itself acts as a very mild bleach, making it good for evening out complexion and calming skin.
    • Lemon Juice - Lemon also helps to lighten the skin and even complexion, while the citric acid exfoliates. Since lemon juice is an astringent, it also dries the blemish. *Since it can be drying, it's important not to add too much lemon juice, especially if you have dry skin.*
    After trying out the original, and adjusting it to my preference, I found that I preferred to add a bit more honey to help reduce redness more and fight bacteria better.

    Honey, Yogurt, and Lemon Face Mask:

    • 1/8 cup RAW honey (very important that it's raw, and not processed with corn syrup or any other fillers)
    • 1/8 cup PLAIN Greek yogurt (must be plain, with no added sweeteners)
    • splash of lemon juice (less or none for dry skin)
    Combine ingredients in a small container, mixing thoroughly. Apply mask to clean face with hands or clean foundation brush. Allow mask to dry (about 20 minutes, depending how thick you apply it), then wash face with a wet washcloth (or clean hands) and pat dry. Store leftovers in the fridge (or eat it, because it's completely edible!). This face mask is gentle enough to use more often then commercial ones, but I'd still try to limit it to 3 or 4 times a week.

    After I use this face mask I apply a homemade toner of diluted apple cider vinegar (the same one I use to rinse my hair, about 1 part ACV to 3 or 4 parts water), although that is completely up to you. It is perfectly safe to use a toner after a face mask; in fact, it tightens the pores! I usually just hop in the shower to wash the mask off, follow up with my ACV toner, and then rinse my face with cool water.

    A foundation brush can help apply an even layer of face mask.

    The great thing about this recipe is that all of the ingredients are edible, so you know that it's safe to put on your skin! You can play with the recipe to find something that suits you better, if you'd like. This could also make a wonderful gift for the holidays! (Just be sure to remind the recipient to keep refrigerated!)

    I've had someone mention concerns about the lemon juice stinging their face, but I can assure you that I've had no trouble with this. However, every skin type is unique. As I mentioned before, lemon juice is an astringent so it has a drying affect. If you have dry or sensitive skin, you may want to leave the lemon juice out.
     
    Some people have mentioned having an adverse reaction to honey and/or lemon juice, so be sure to test this recipe (as well as any other) on the inside of your wrist. If you feel any stinging or burning, wash it off immediately and DO NOT use it on your face.